

Signed, sealed, undelivered
If you've ever been at home eagerly awaiting a parcel only to find the delivery person has been and gone and didn't even ring the bell, or your parcel was delivered unreasonably late or was even lost – you're most certainly not alone.
With around 1 in every 150 parcels disappearing, ever wondered what happens to your parcel when it goes missing? Between the time you purchased it, and it arriving, or not arriving, at its final destination? Did it get lost in the postal system? or was it mis-handled by a warehouse, postal and courier person? or was it simply just lost in transit?
My Role: Senior Product Designer, UX Wireframes, UX Design, UX Research, UI Design, Brainstorm workshop, Product development, Conceptualisation, Ideation, Inventor.
UX Research methods
-

Stakeholder and user interviews
-

Review data and analytics vs requirements and constraints
-

Qualitative survey and field studies
-

Support Call Center monitoring and Mind Mapping
-

Value proposition and insights into hypothesis
-

Competitor analysis and competitive testing
Key focus areas
Interviewed customers
My research and customer interview goals were to test my assumptions with my target audience, having recently purchased, or about to make a purchase, themselves. I investigated and discovered how they currently executed this.
To collect this information I created a discussion script/guide and conducted three interviews, each session lasted 45-60 minutes. I also analysed the current state of customer complaints through our call centres and ‘Contact Us’ forms.
Competitive analysis
I identified major competitors in the form of courier services, supermarket delivery, Australia Post and researched their mail and truck distribution, processing plants and carrier loads. By doing this, I could create a solid business strategy that would help leverage us against our competitors.
UX Design methods
-

Created User Stories and Personas
-

Competitive and Task analysis
-

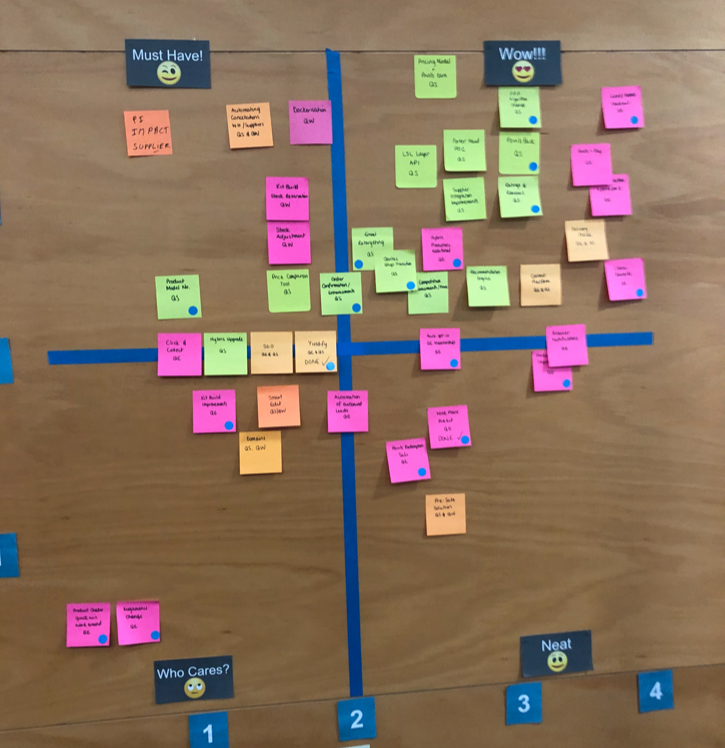
Facilitated ideation workshop using “How might we”
-

User flows and Customer journey
-

Persona building
-

Card sorting, Hand Sketches and Wireframes
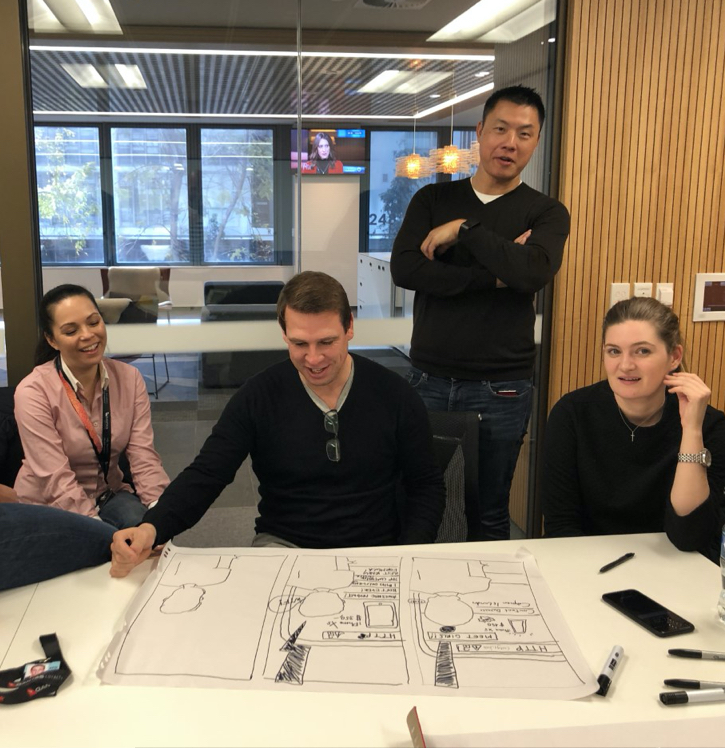
1. Define the customer problem vs business value?
I brainstormed with stakeholders and team to define what problem we were trying to solve and what value it had to the business
-
 Can I define the problem?
 -
Can I understand the value?
What user problem will you be trying to solve?
-
“How might we” delight customers with a delivery service that exceeds expectations?”
-
“How might we” make receiving of a parcel process easier for customers?
-
“How might we” anticipate the missing actions of our postal system?
-
 Great way to answer this question isto create user personas so that we know whom we are designing for
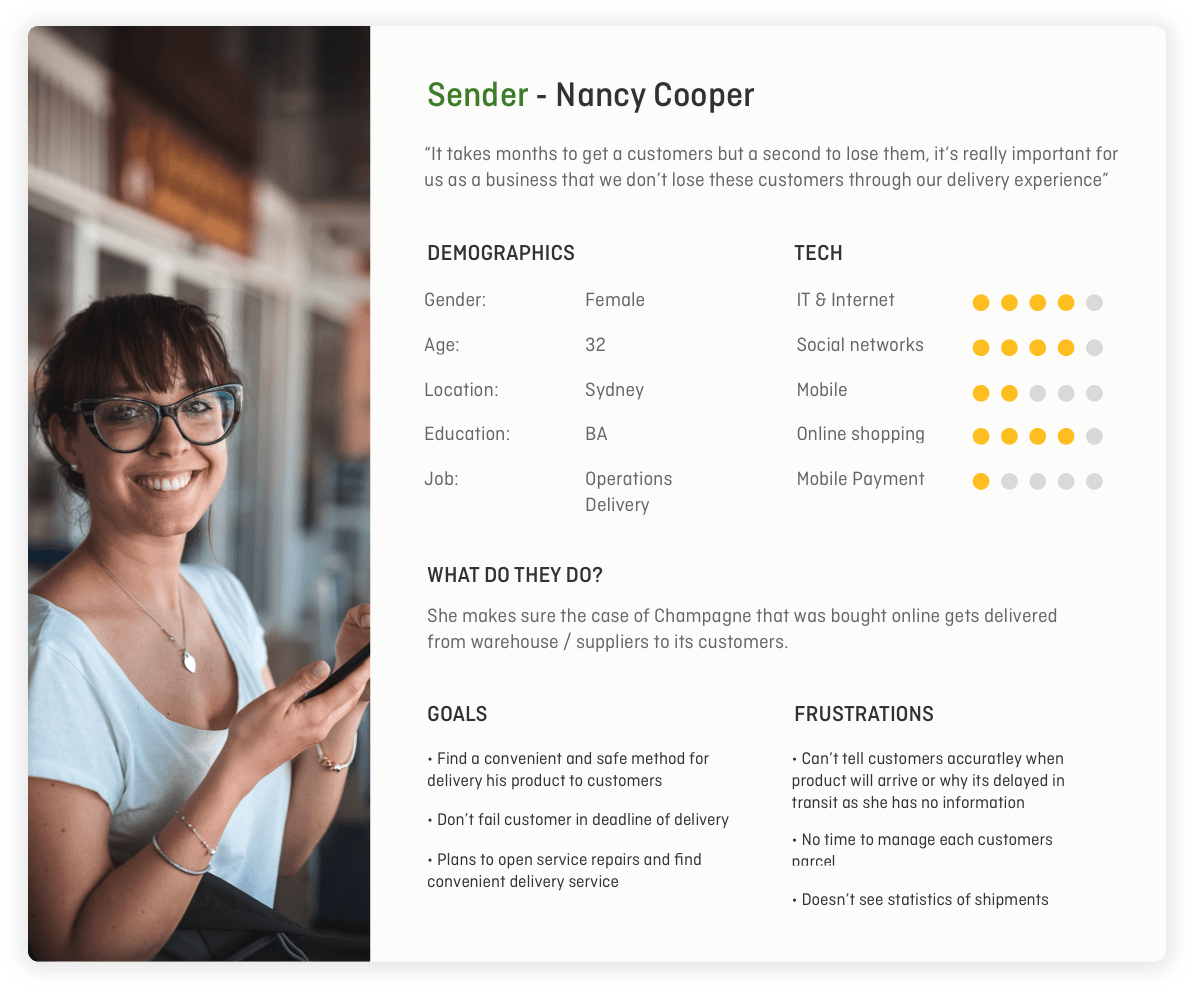
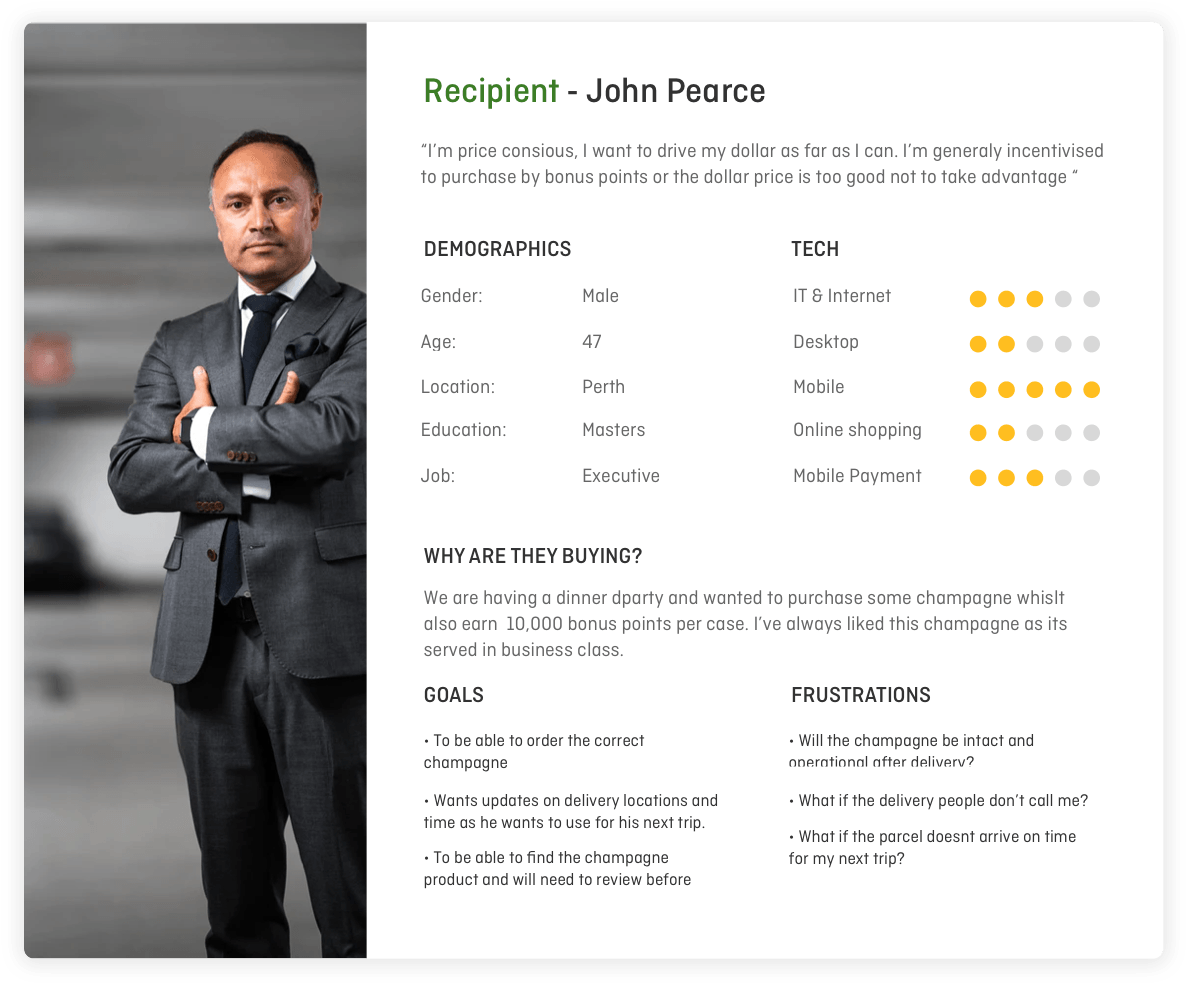
User Personas
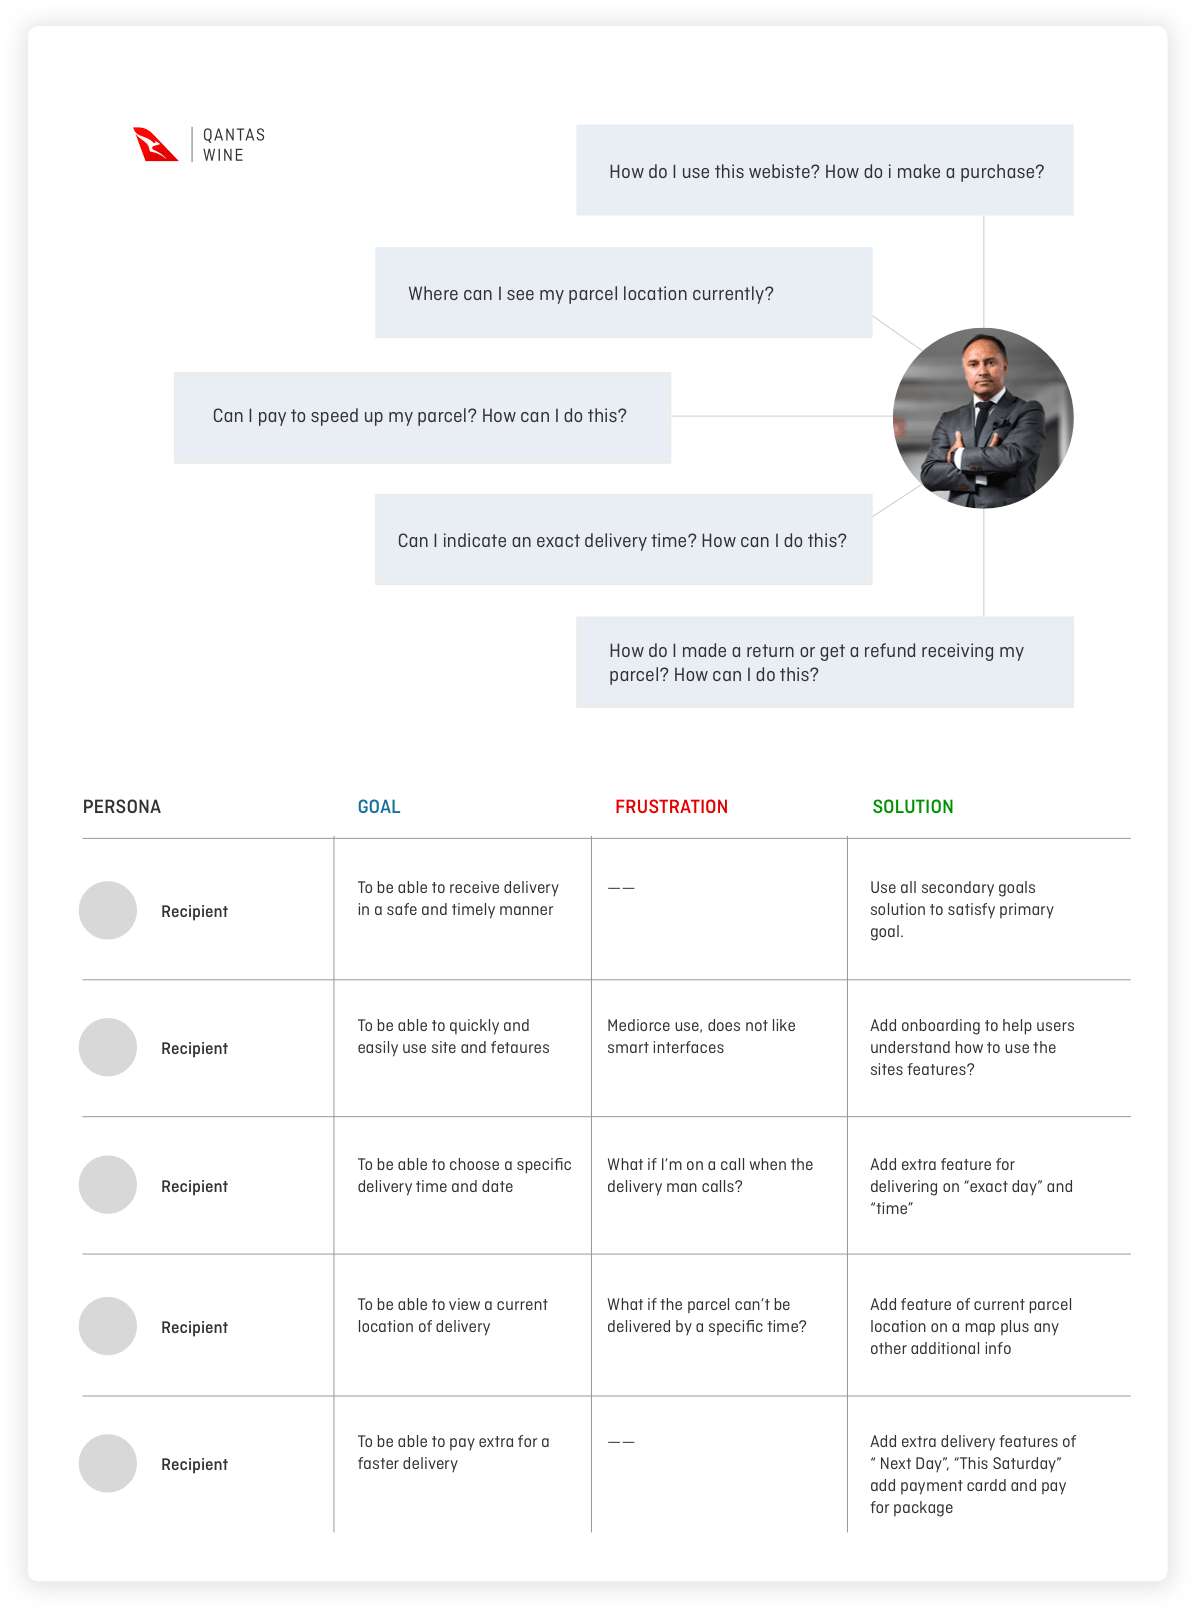
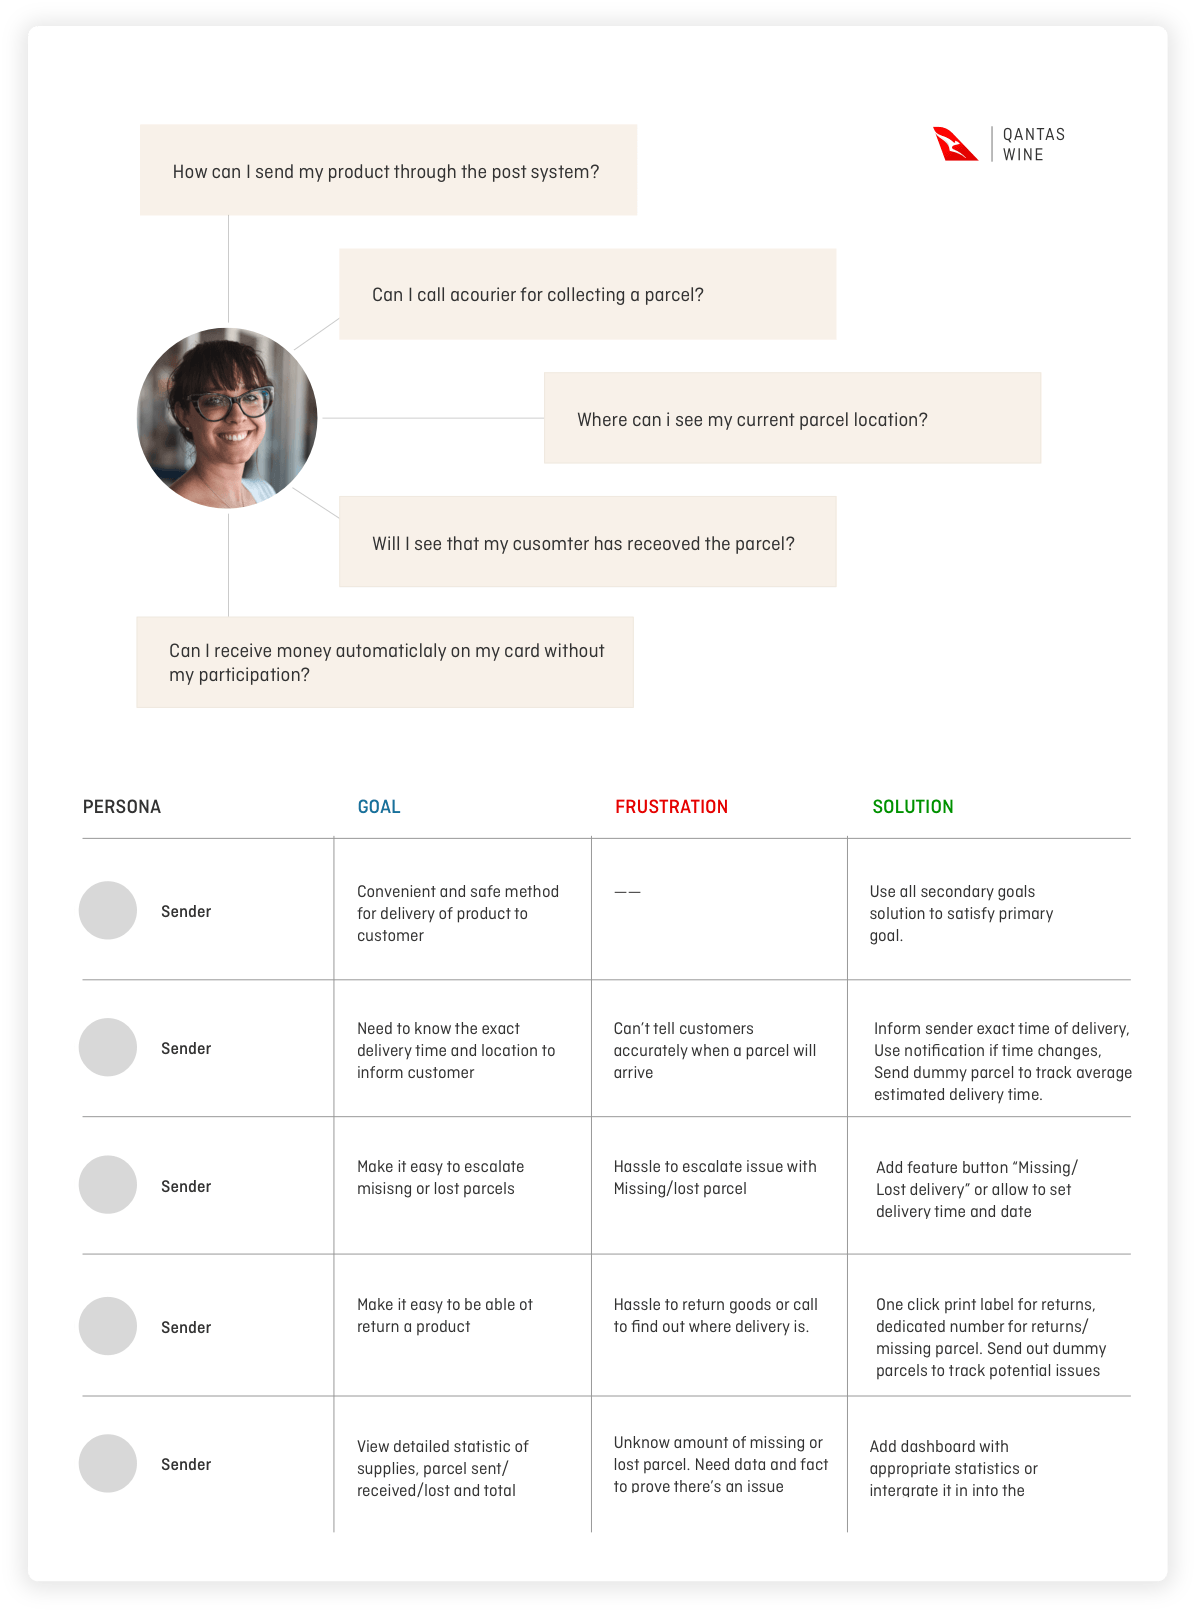
From the customer interviews, I created 2 personas (Sender and Recipient) to better understand what the customer's goals and frustrations were, and to further understand the goals and frustrations of the business.
User Goals and motivation
I then created a Mental Model of the personas to help create solutions based on their goals and motivations. This was a valuable tool, allowing me to quickly solve nuances for users and the business. These were then turned into ‘feature solutions’ that we could action straight away to increase our conversion.
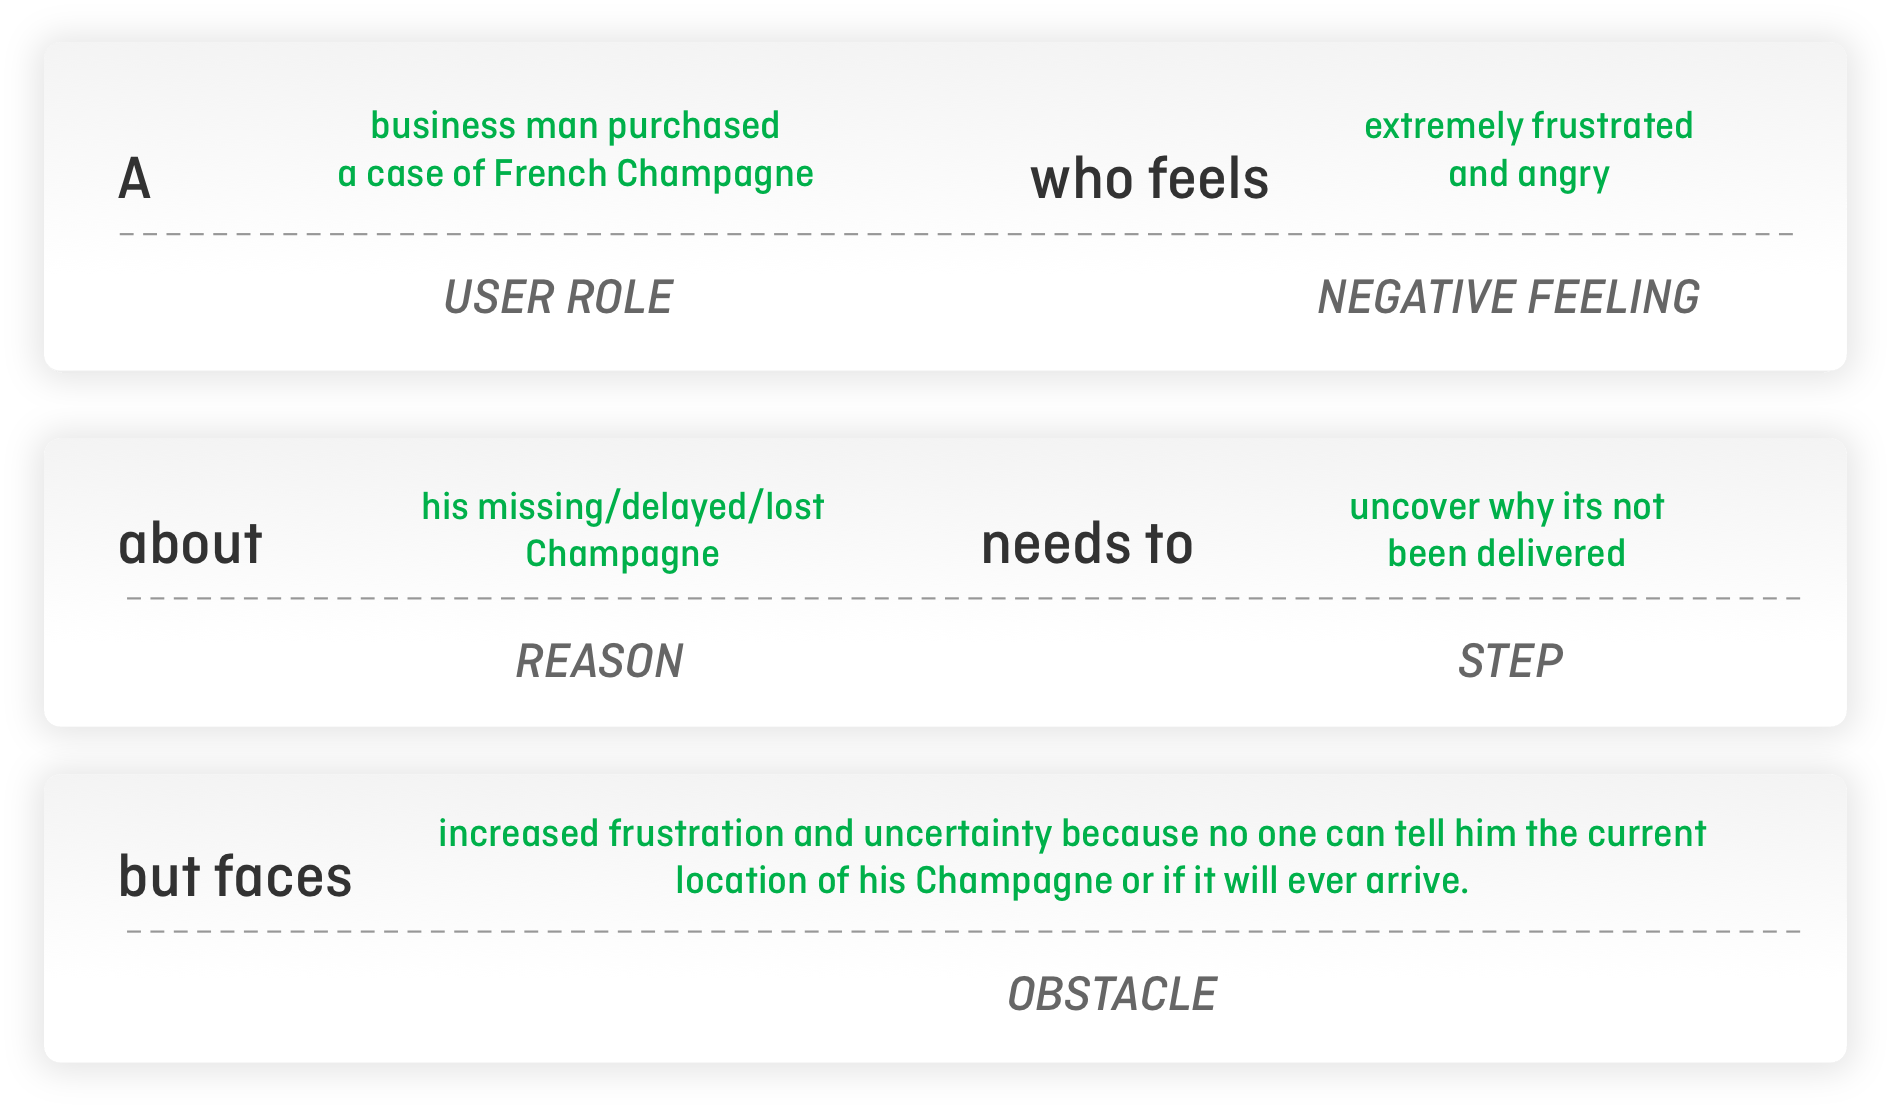
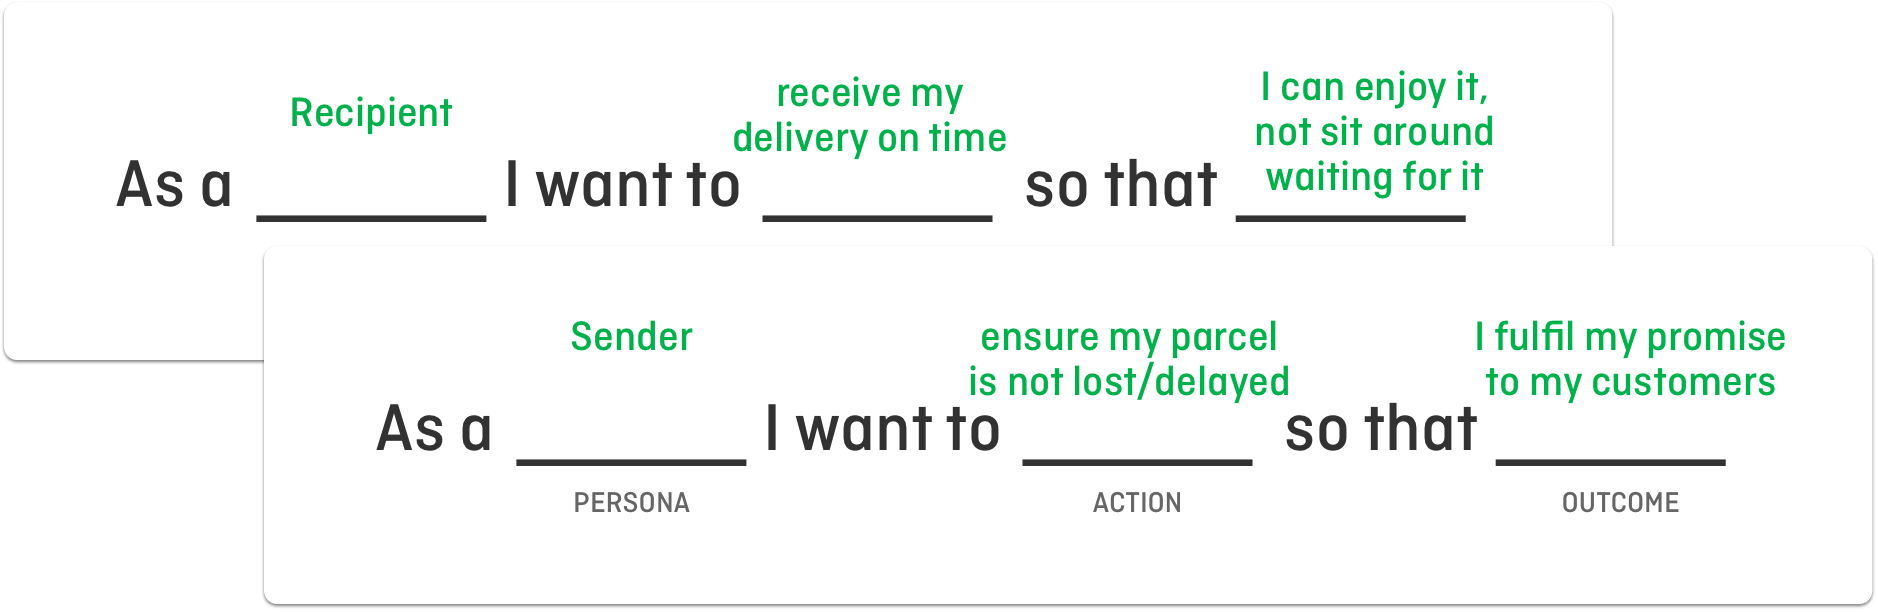
User Stories
Once I understood the motivation and goals of the users I created some User Stories that allowed me and the team to view a bare structure of the users primary goals.
“How might we track and record the delivery steps to ensure our customer receives their parcel?”
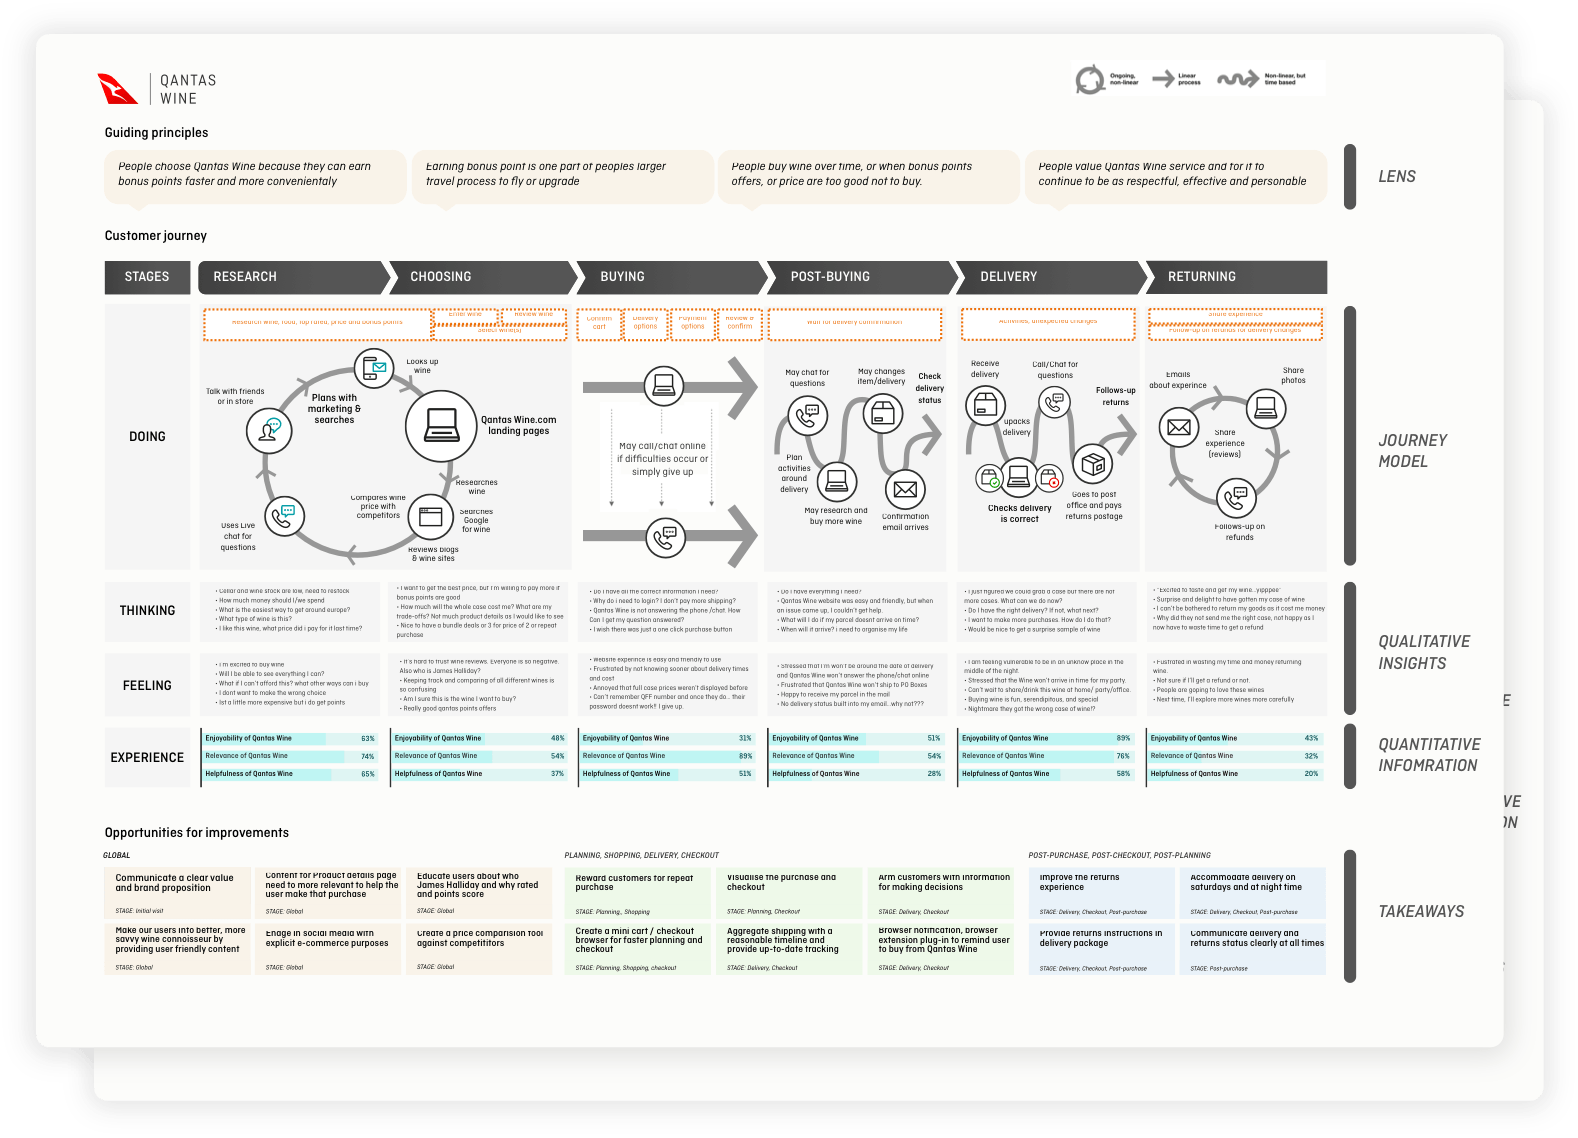
Customer Journey Map
I used my Customer Journey Map to align my research. I used this to identify the steps that users would take when they needed to report a missing/lost parcel.
According to my Customer Journey Map and research, I centered problem solving around “Post buying” and ”Delivery” stages as these were ultimately the users’ higest pain points.
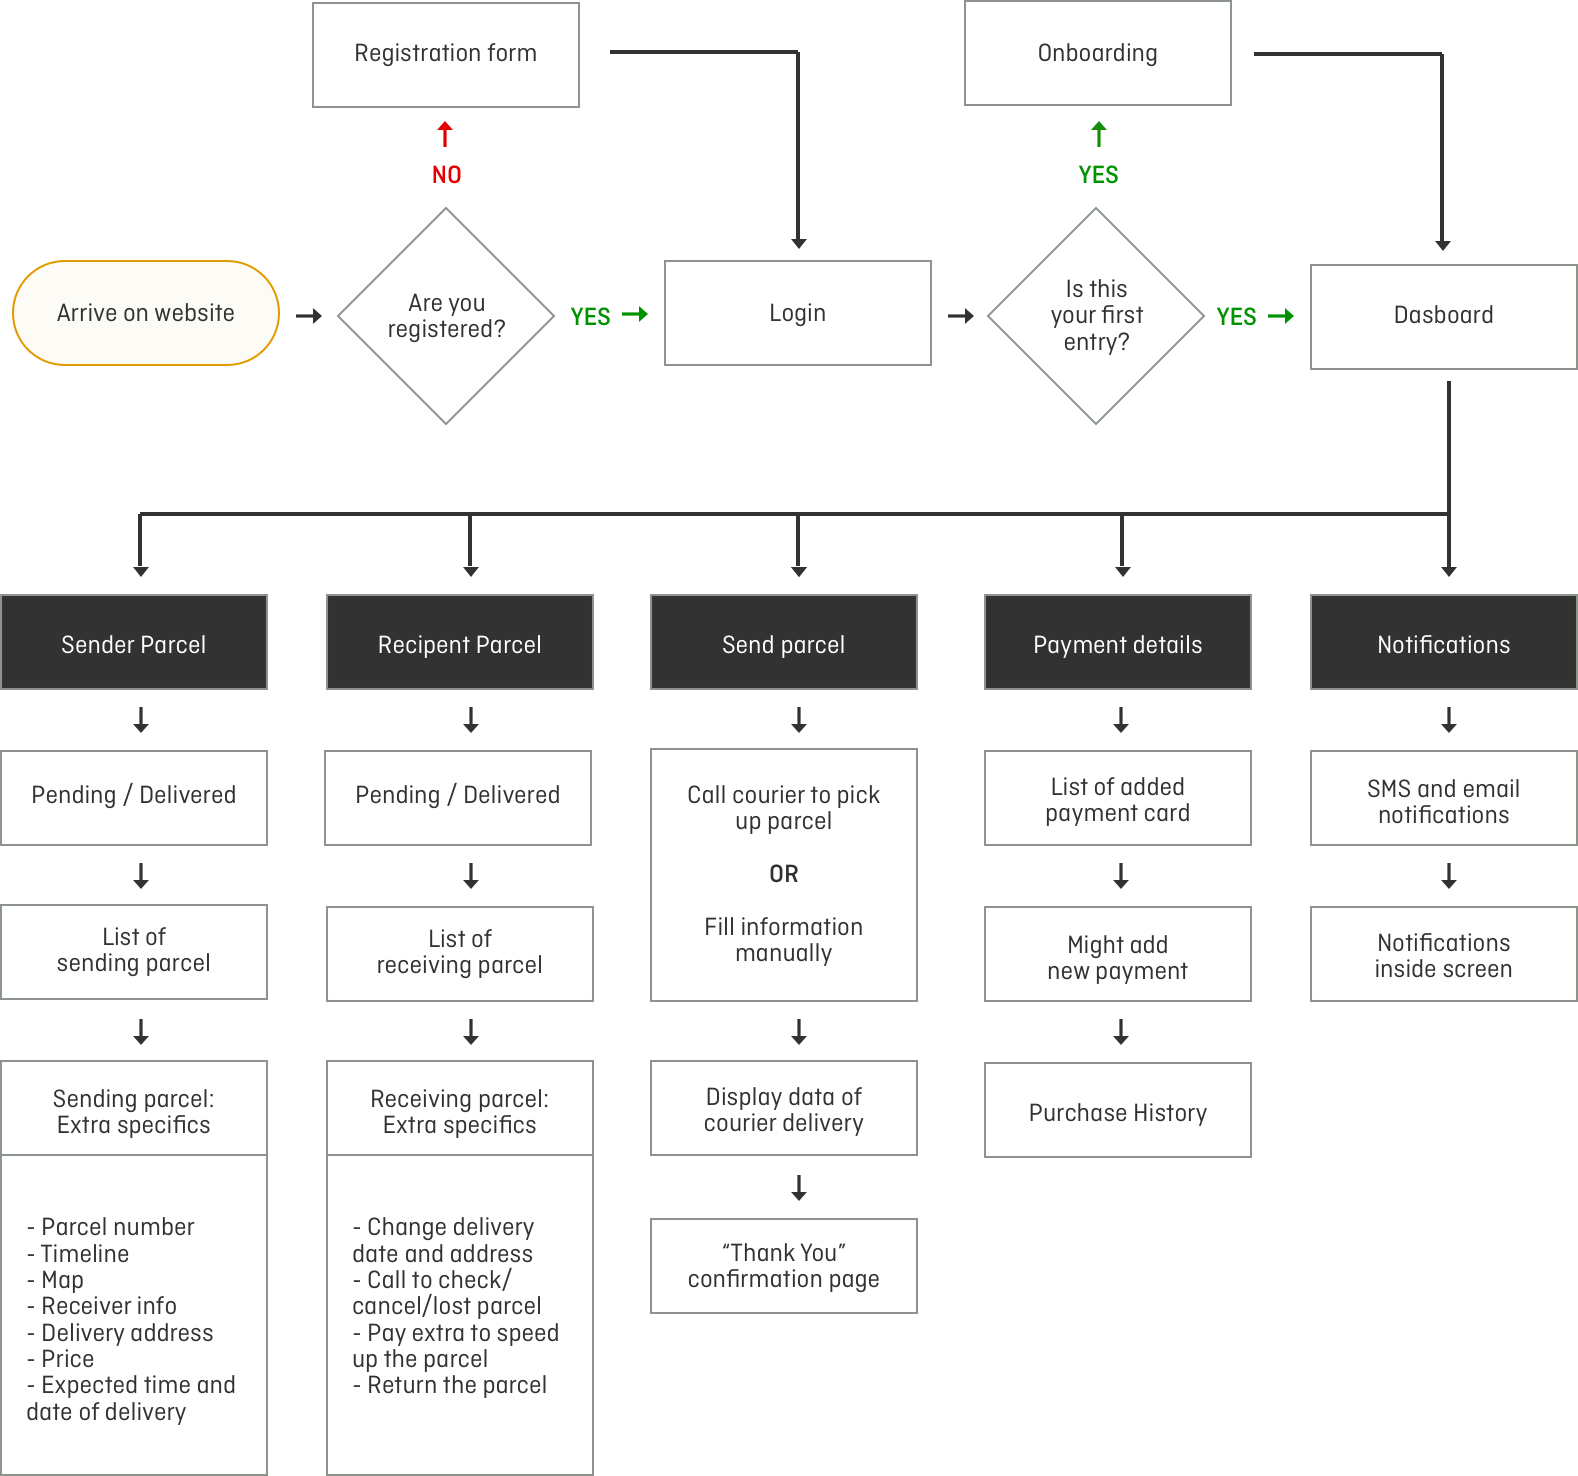
Information Architecture
Once I had the User Stories and Customer Journey, I was able to create the information architecture. Using these schemas below provided me with the bigger picture of logic, steps, process and required screens that a user would need to go through.
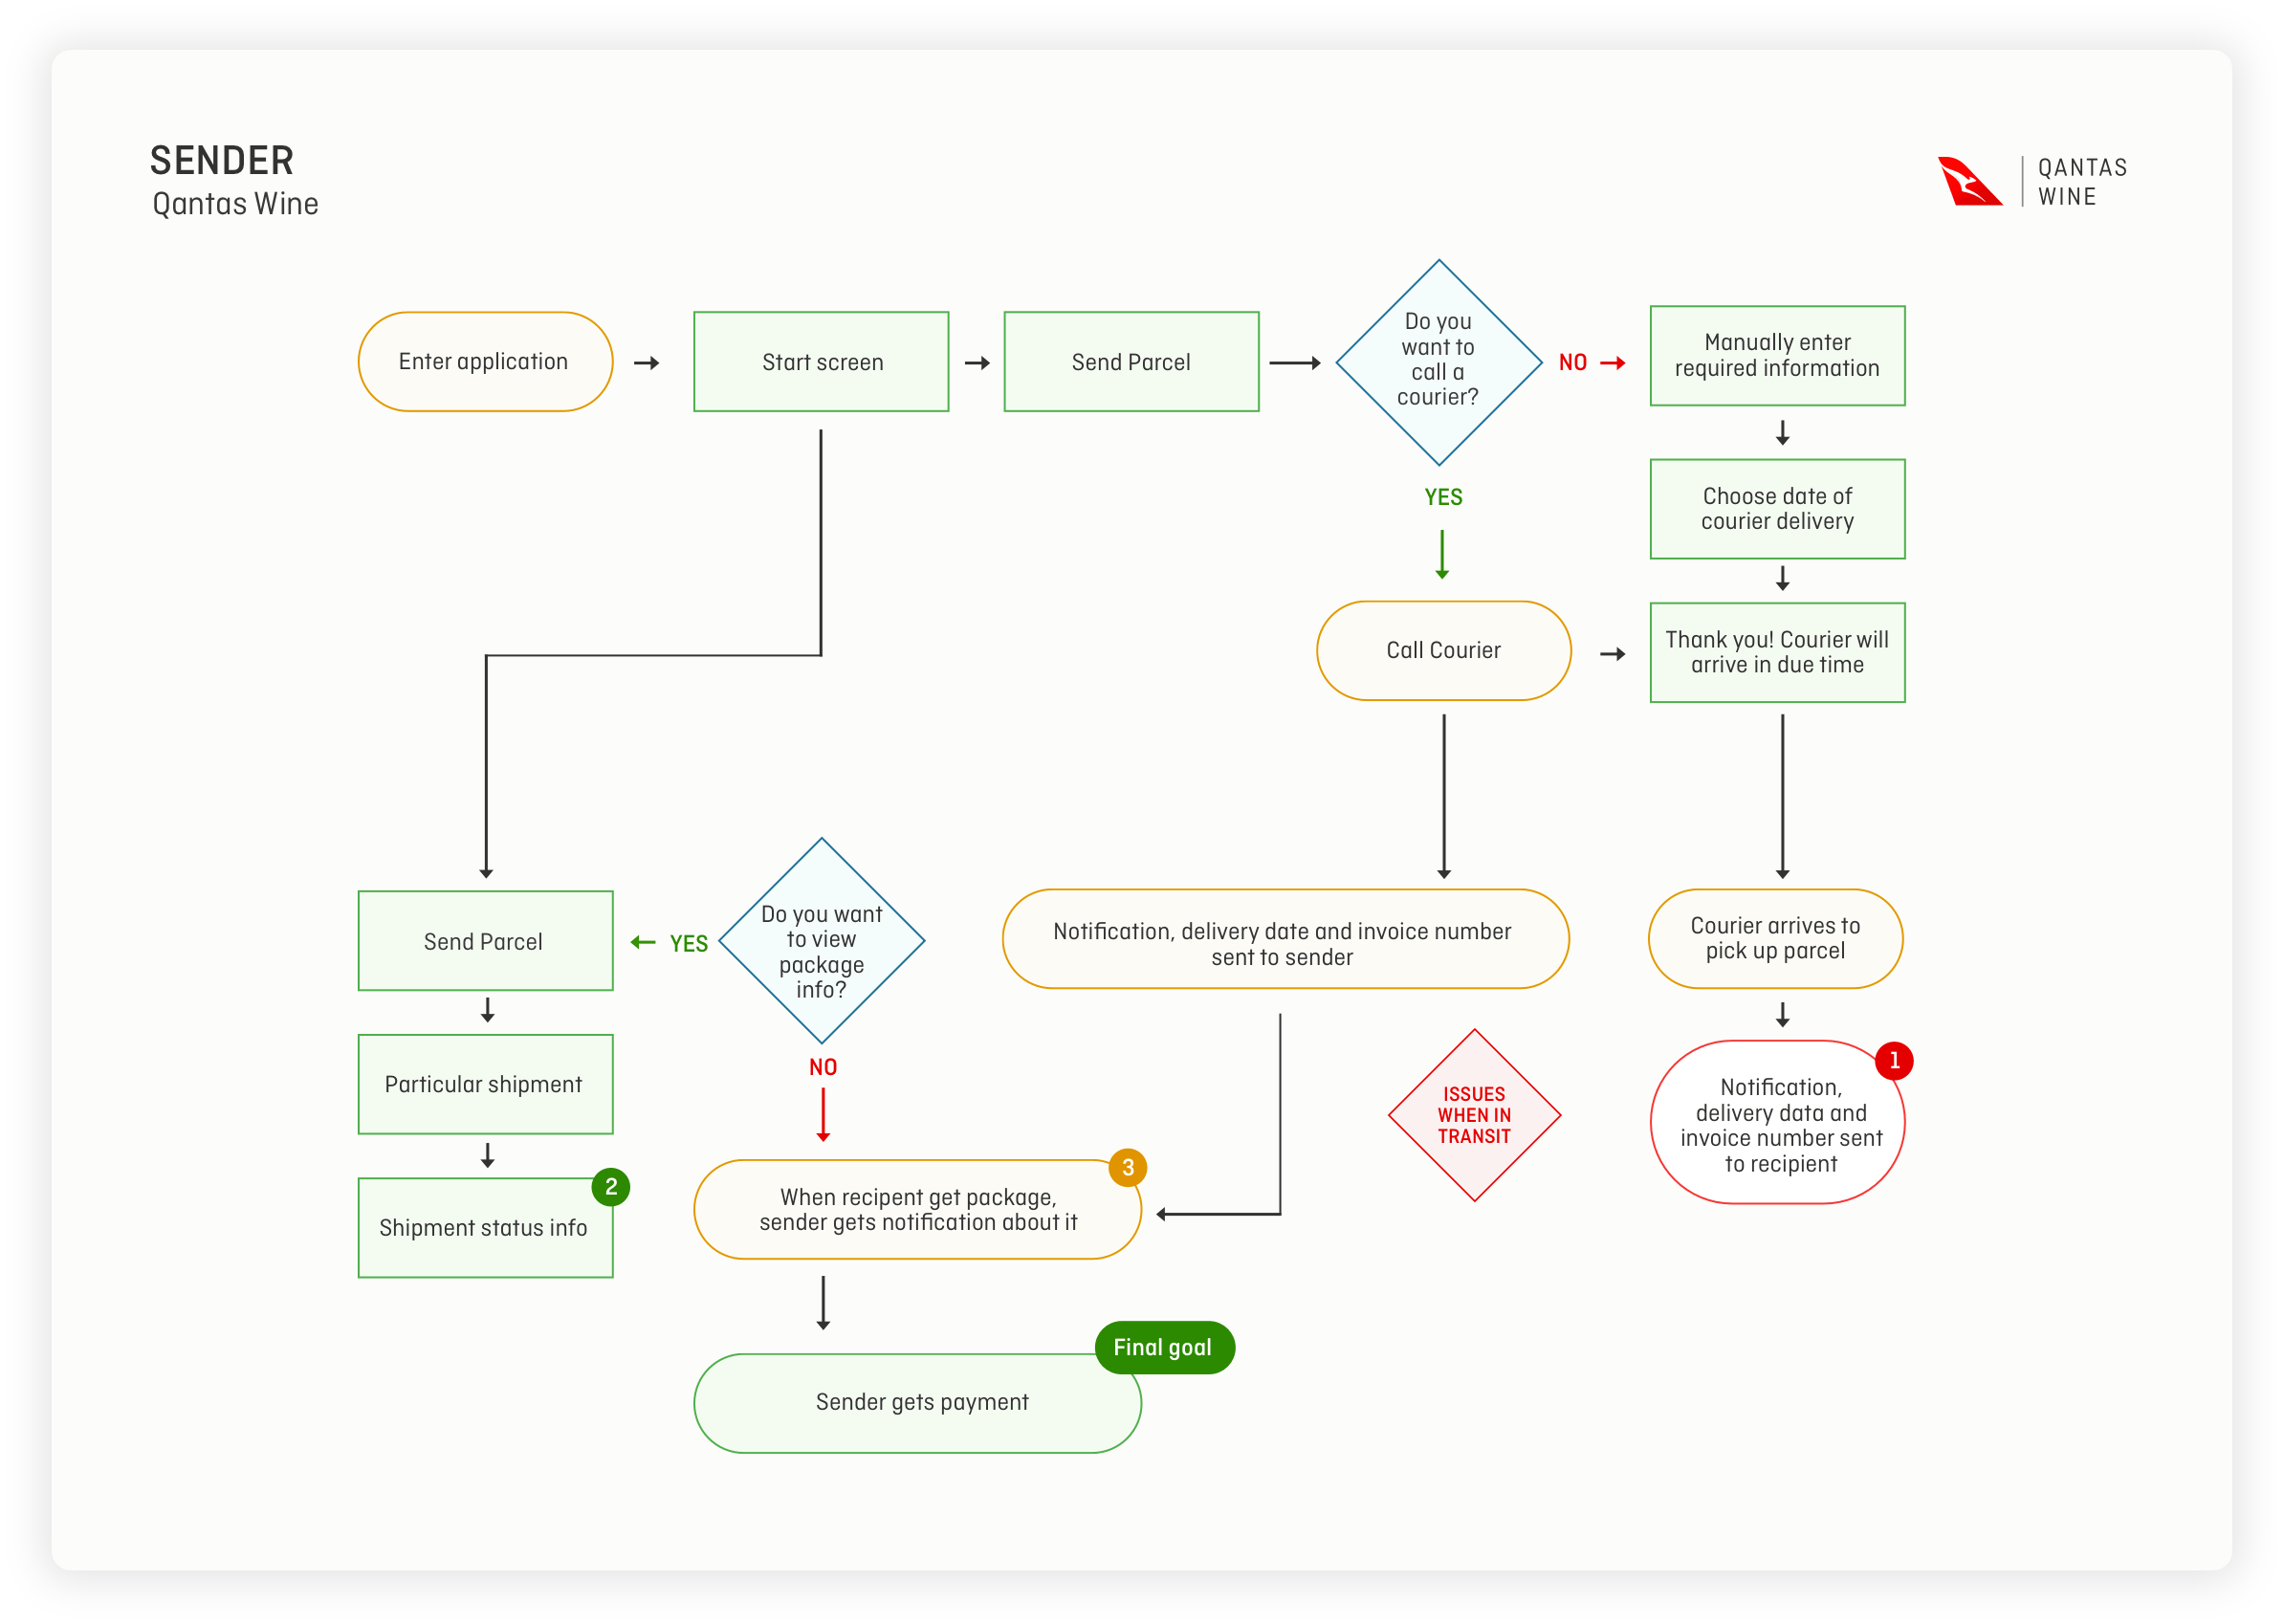
User Flows
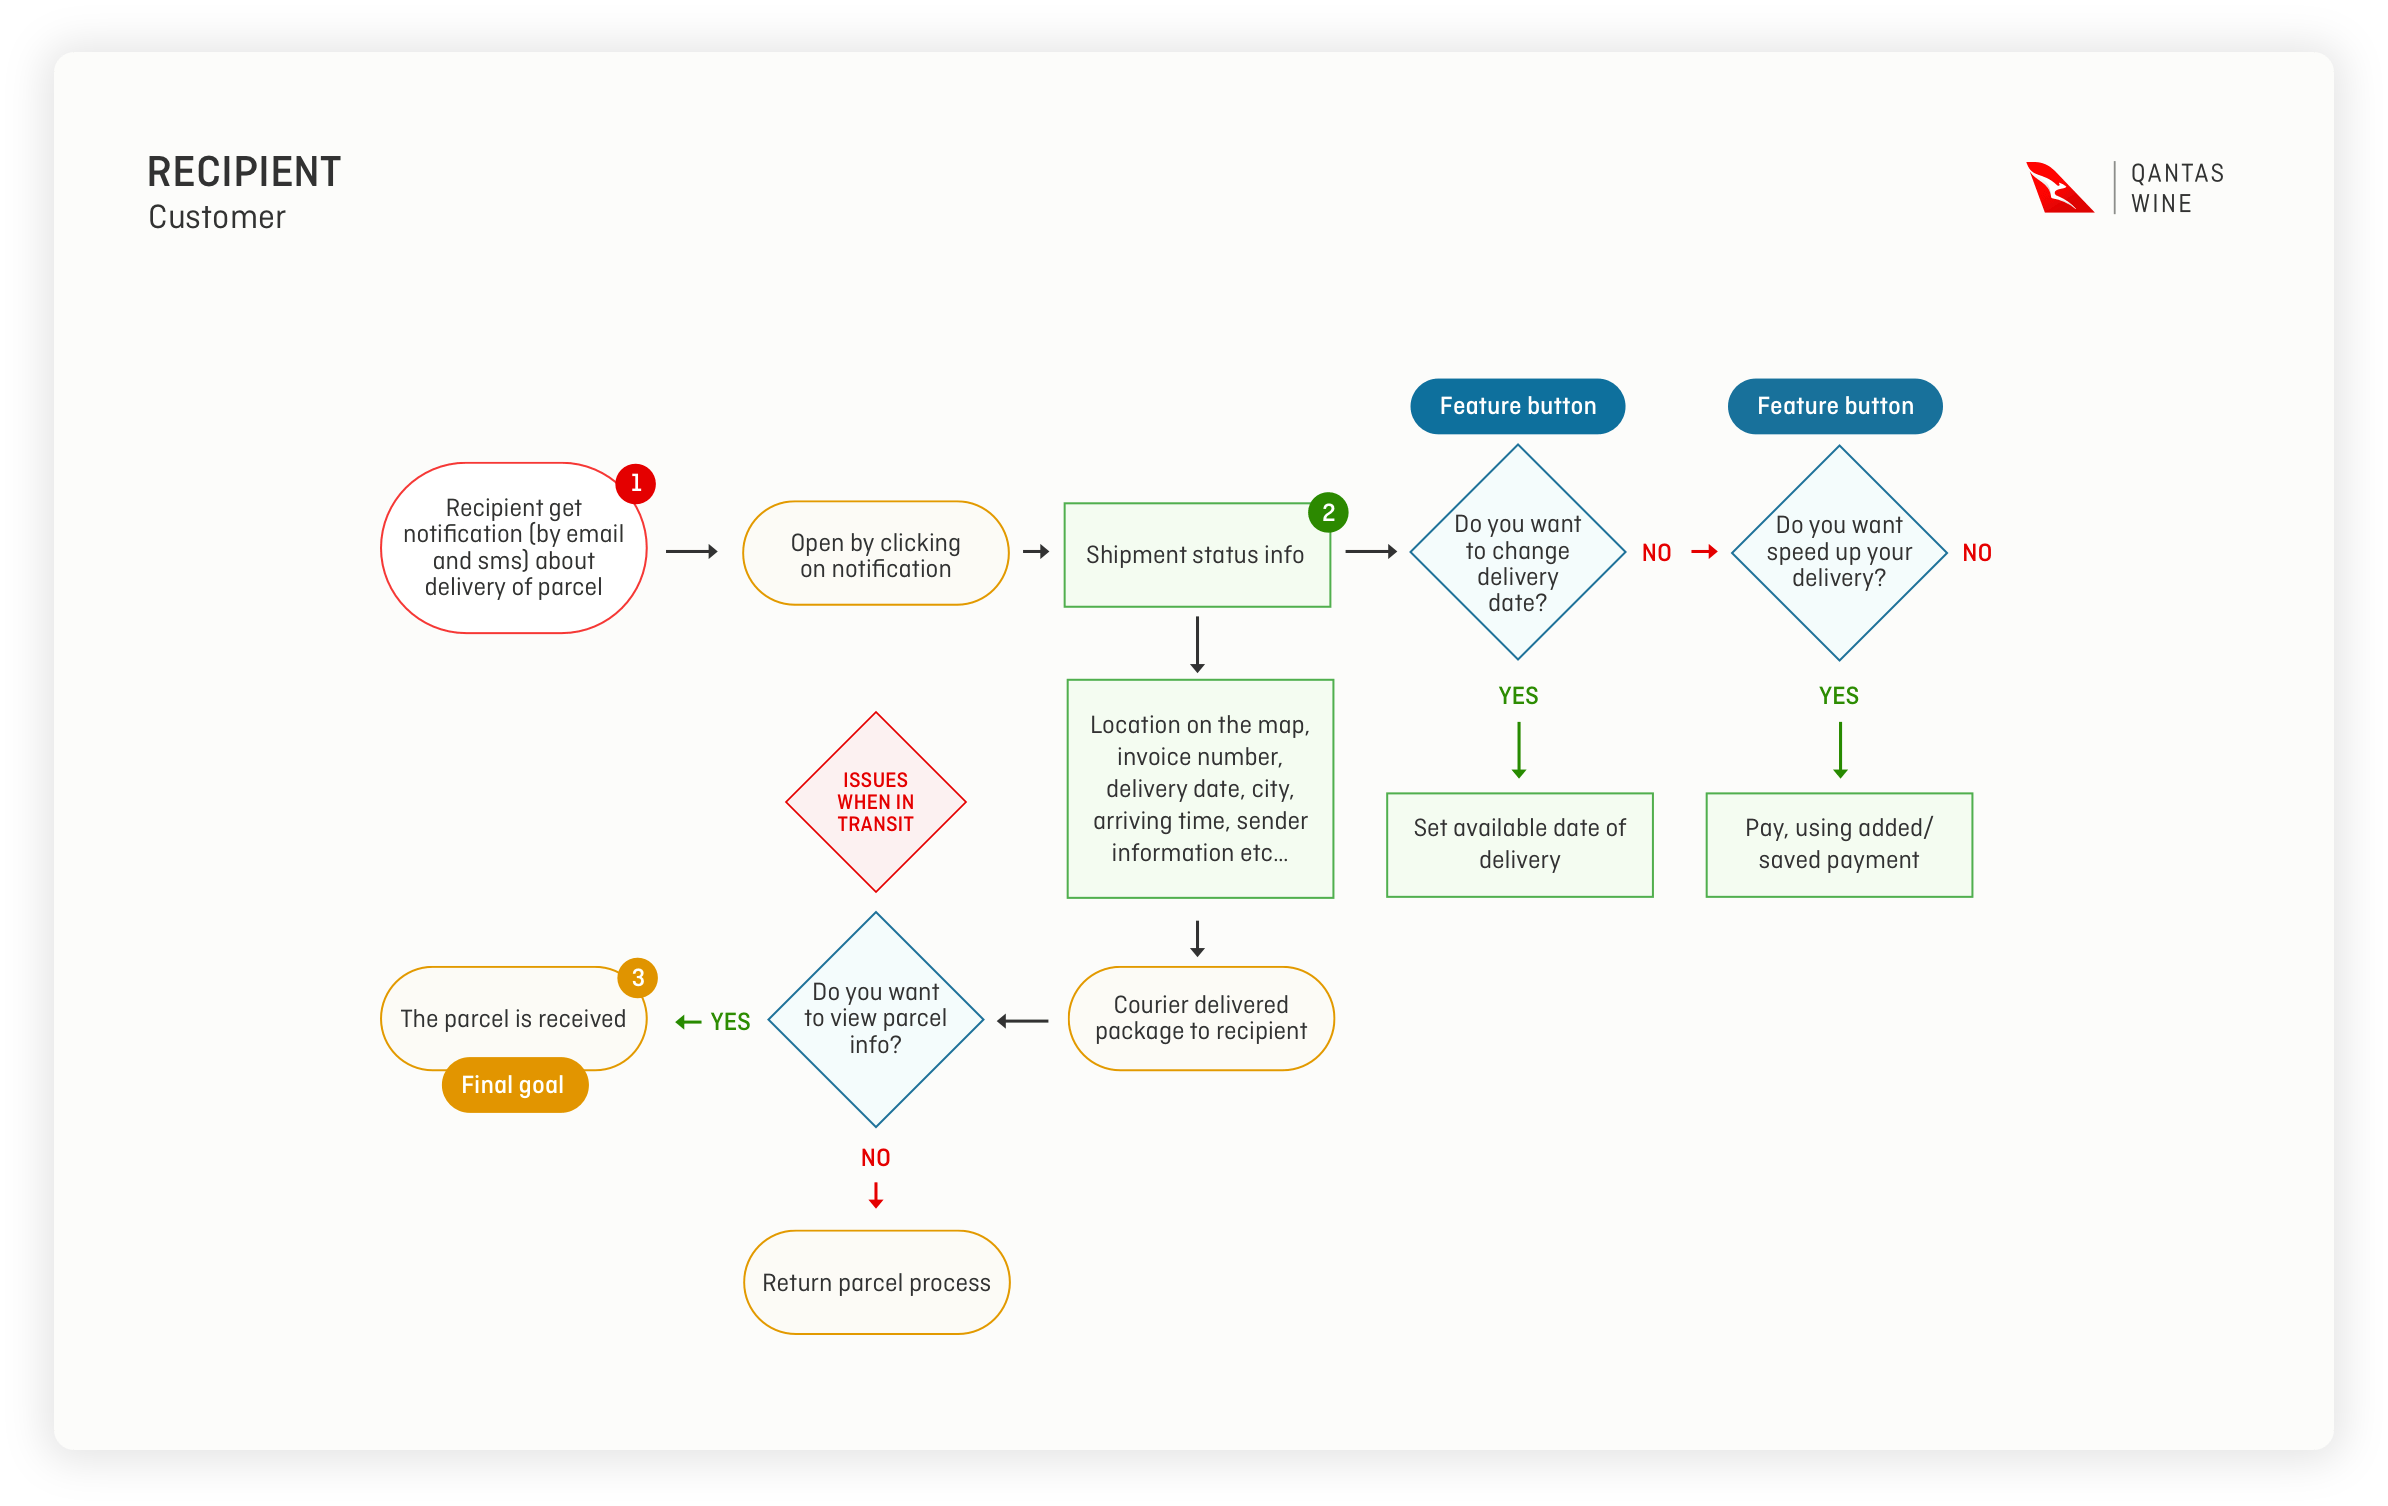
With the information architecture created, I used this to then look at the User Flow to action goals of both the sender and recipient of the parcels.
It helped me further understand and validate the pain points of the recipient and the sender - both were left in the dark due to a lack of transparency and information once the delivery was in ‘transit’.
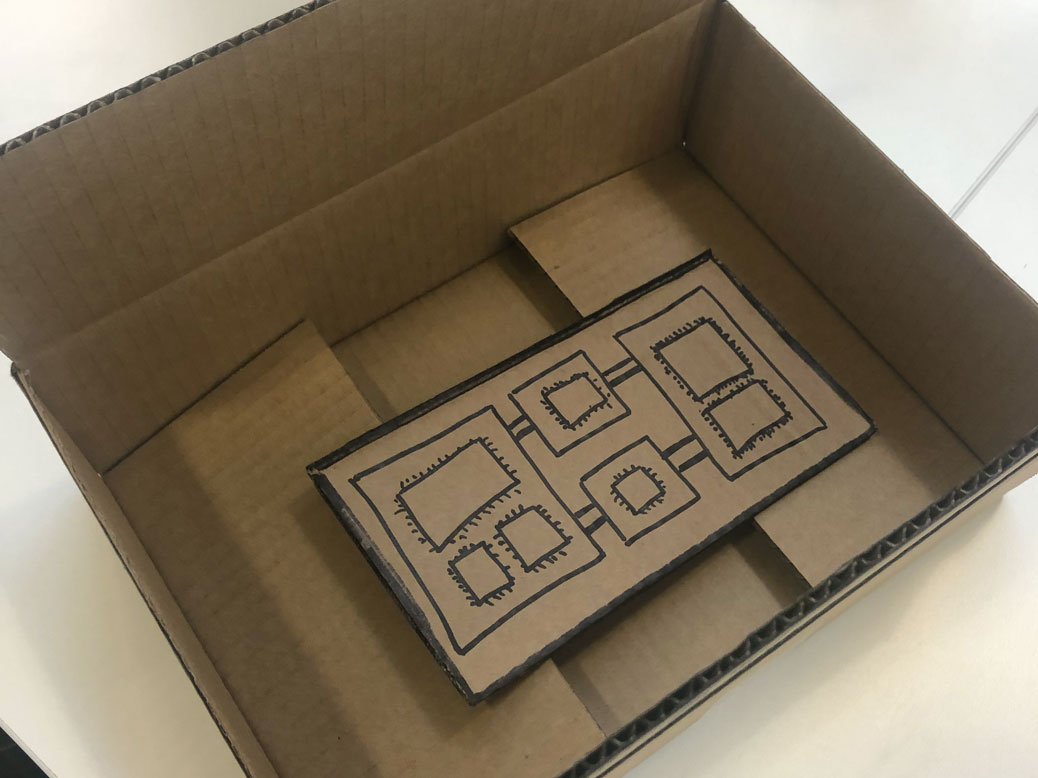
Why build a “Spy Parcel”?
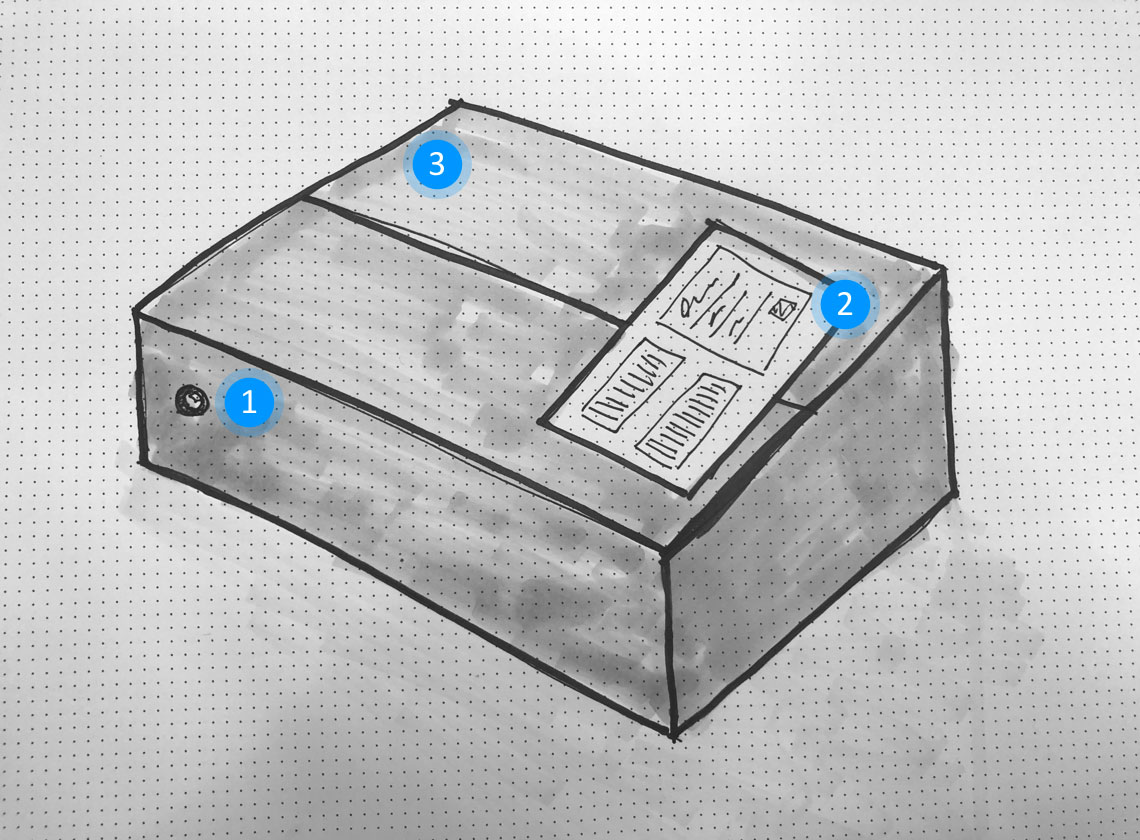
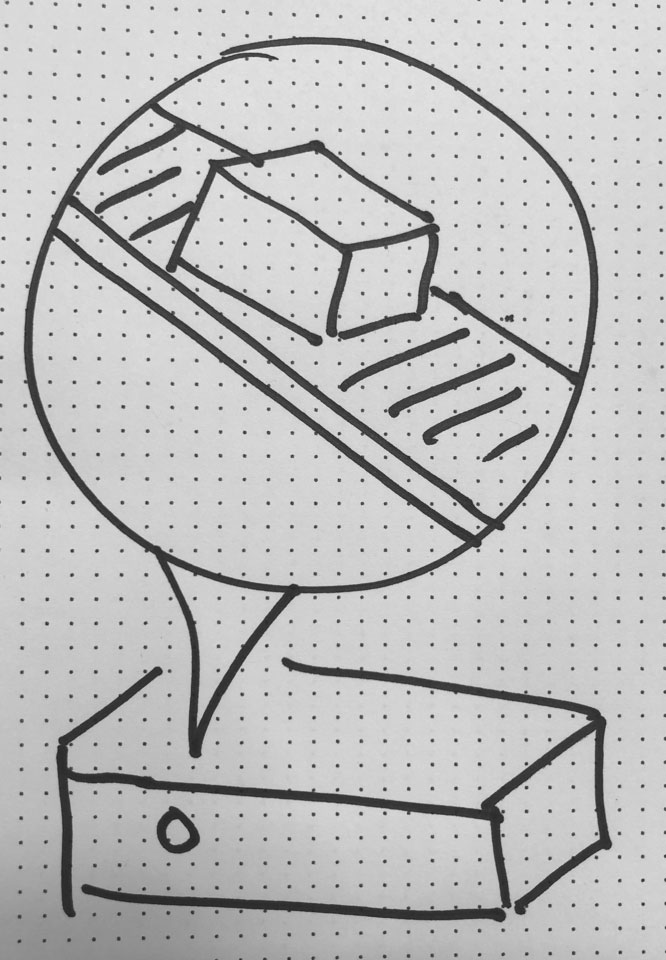
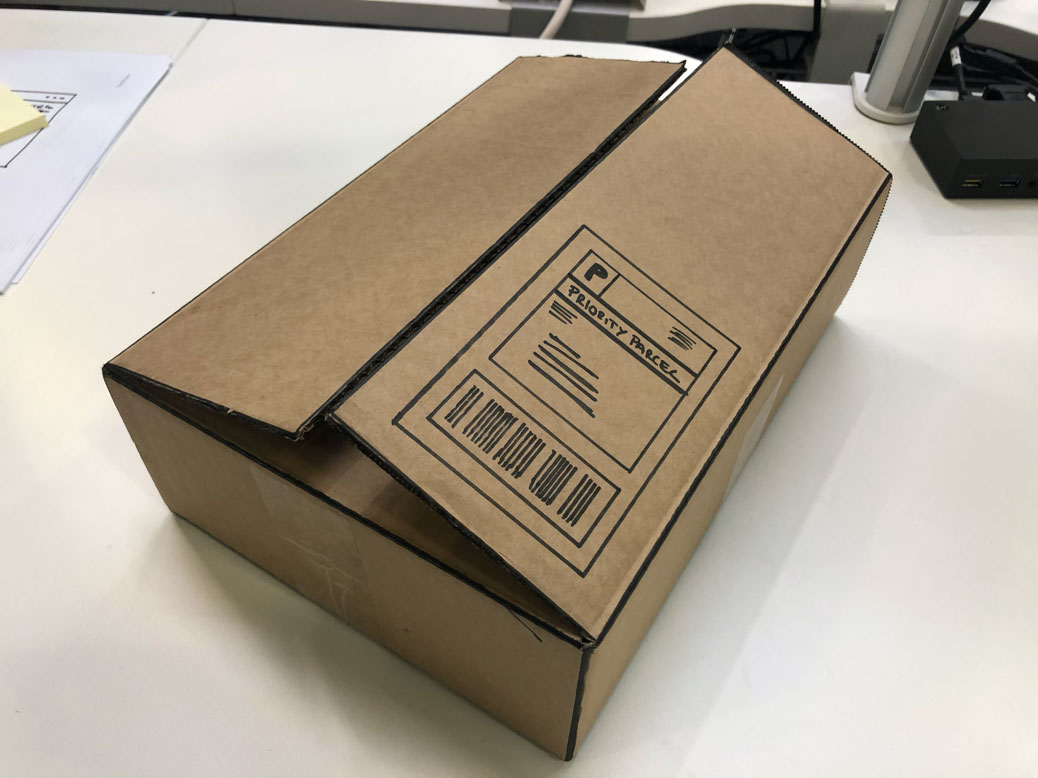
I conceptualised the idea of creating a physical “spy parcel” because it was the only way to see behind the scenes of the postal system and the way that distribution and transit worked.
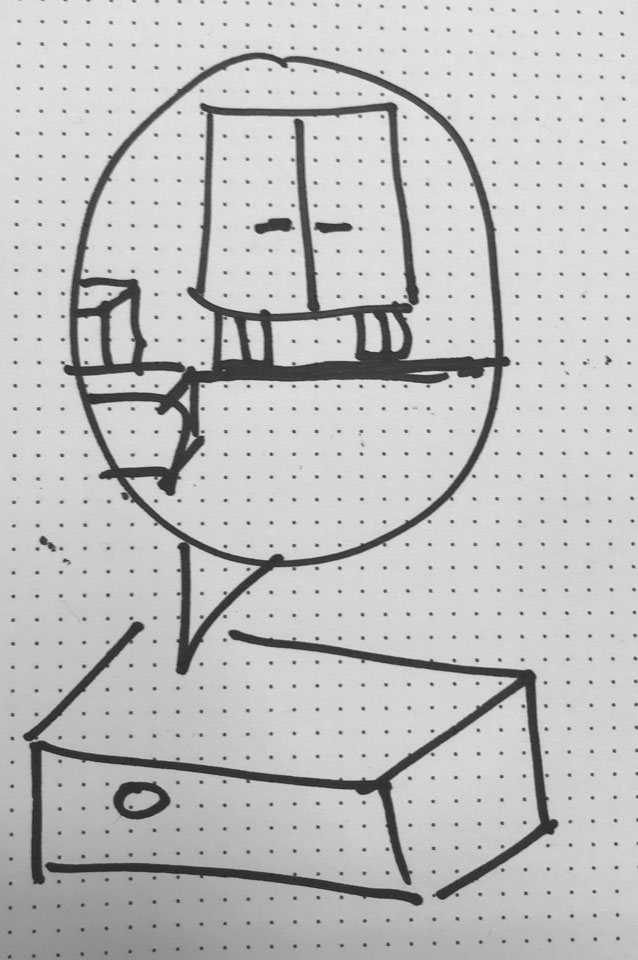
As I had no evidence to further substantiate and validate users frustrations I made sure that this parcel had hidden cameras to record video snippets of its location, postal environment, type of transit and handling.
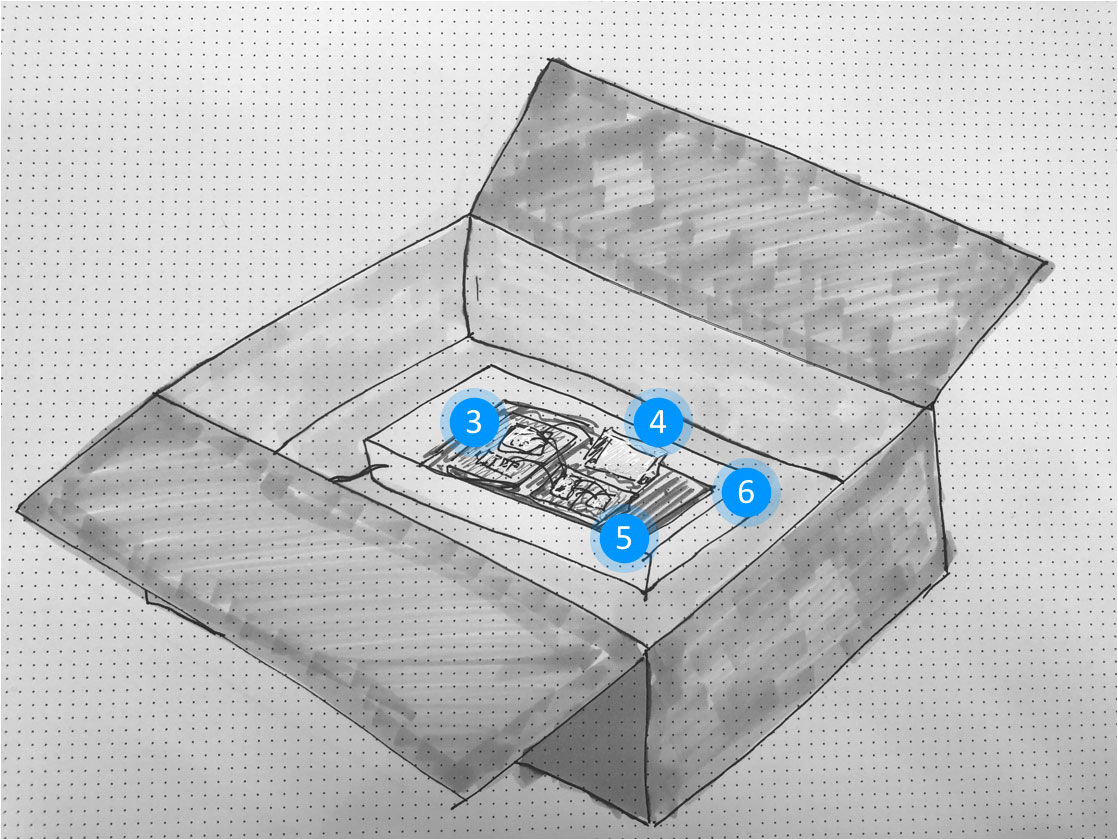
Inside the parcel, a video timer recorder and a GPS location tracker circuit using Arduino (a simple single-board microcontroller designed to control devices) acted as the hardware which would switch itself ‘on’ to record all of the ‘interesting' parts of the journey for 15 secs at 5 mins intervals, the GPS tracker data mapped the route, stops, distance and speed.
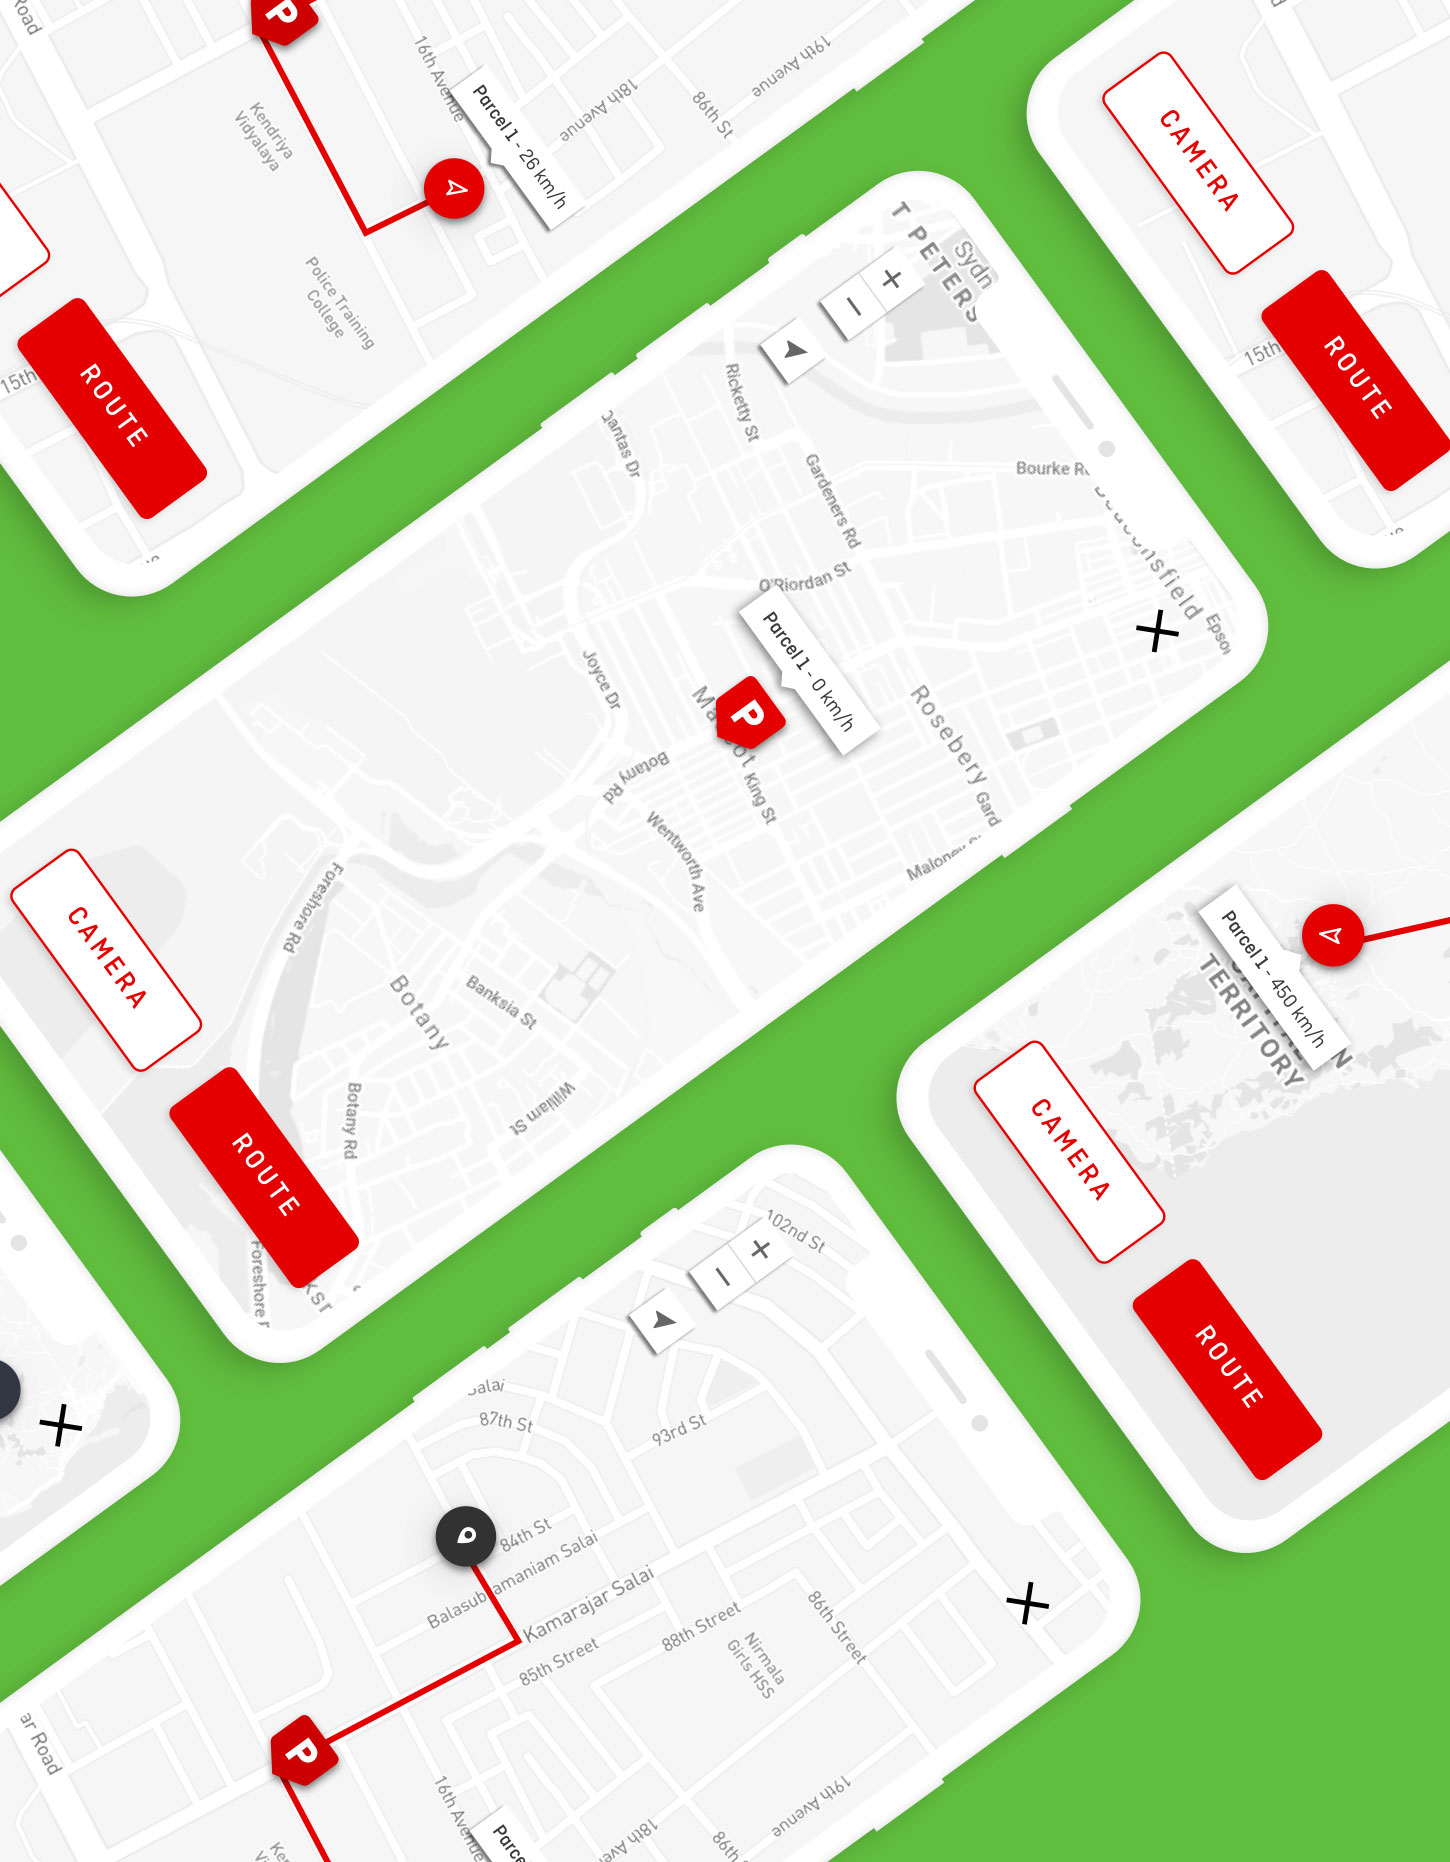
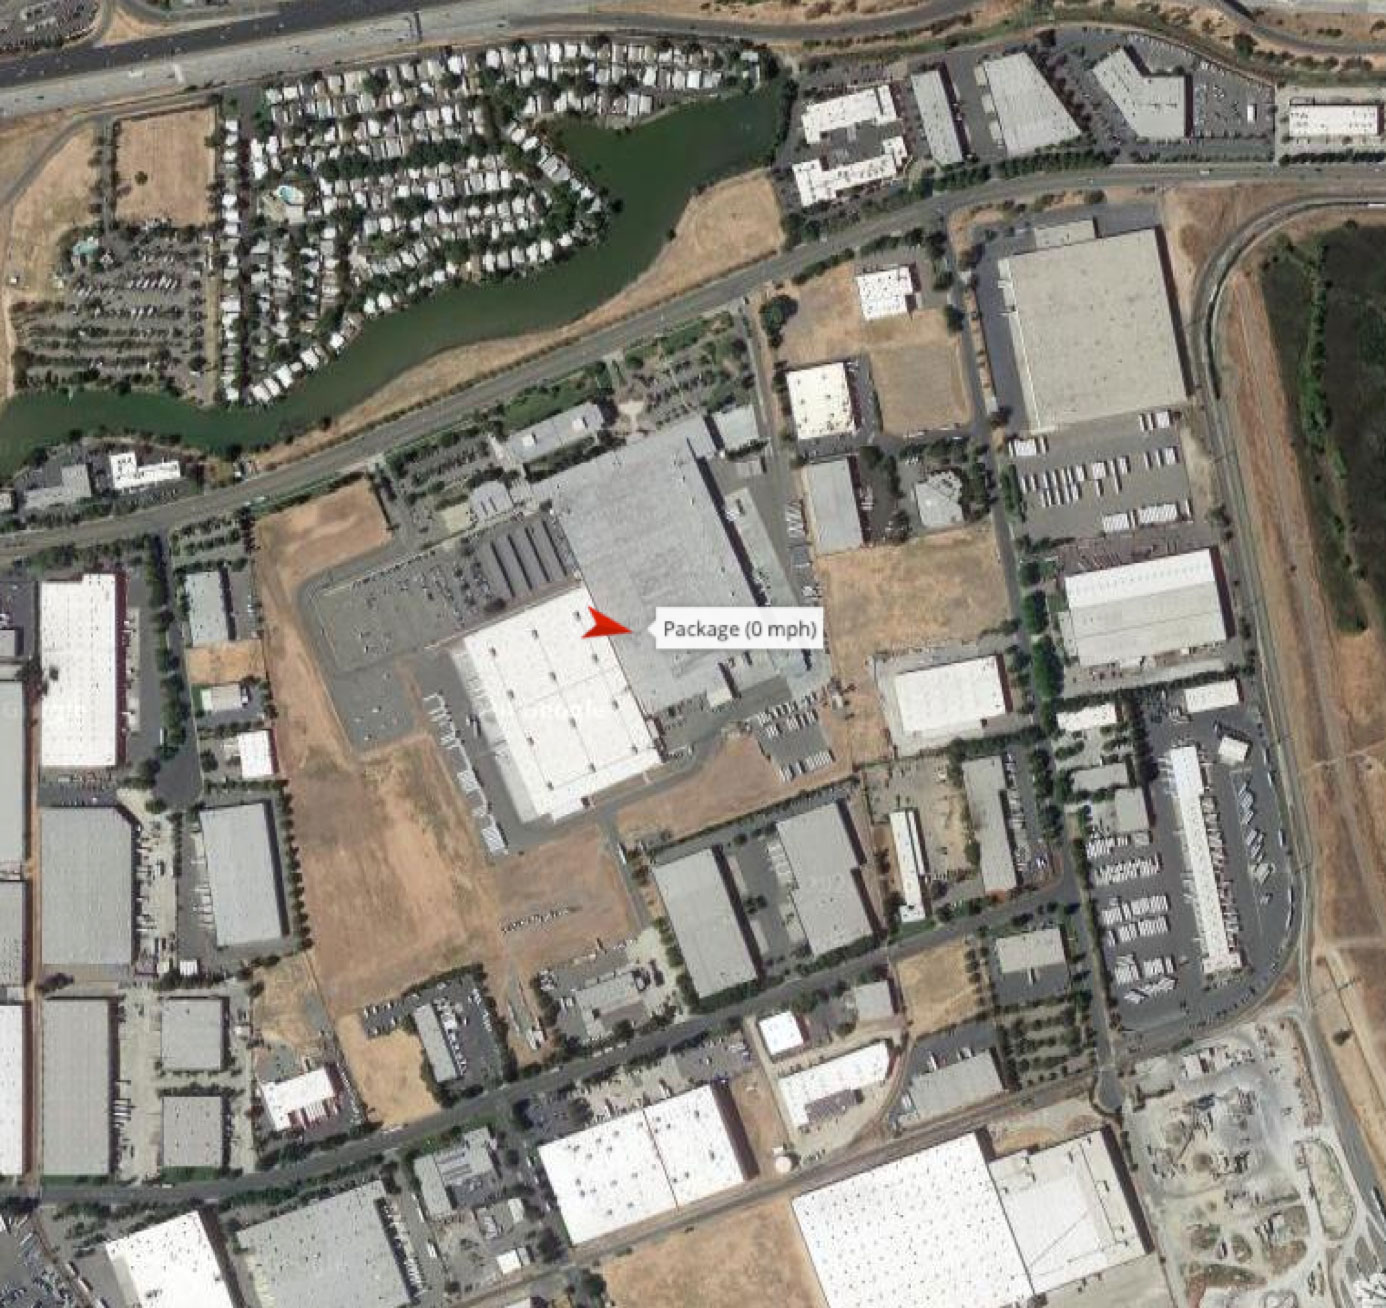
What will the parcel track?
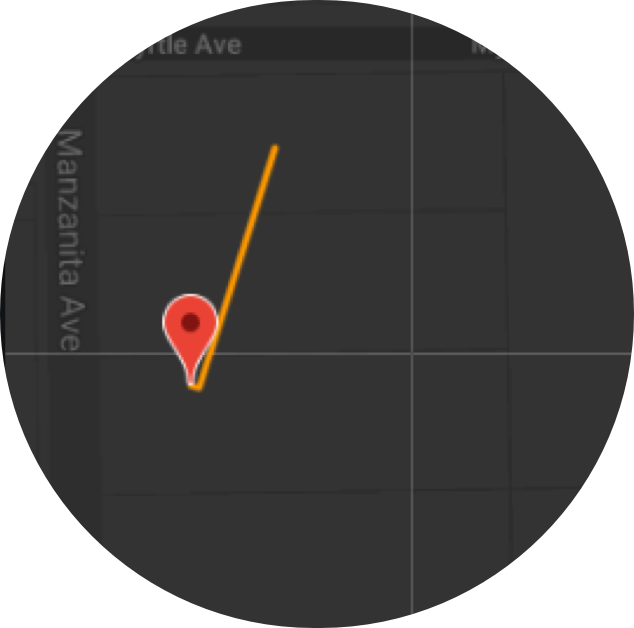
I wanted to record the step-by- step of the parcel’s route, location, speed, distance, height using Google maps when in transit.
When transit stopped for longer than 5 mins, I want to show a parking/stop sign. I also want to be able to switch between route and camera view.
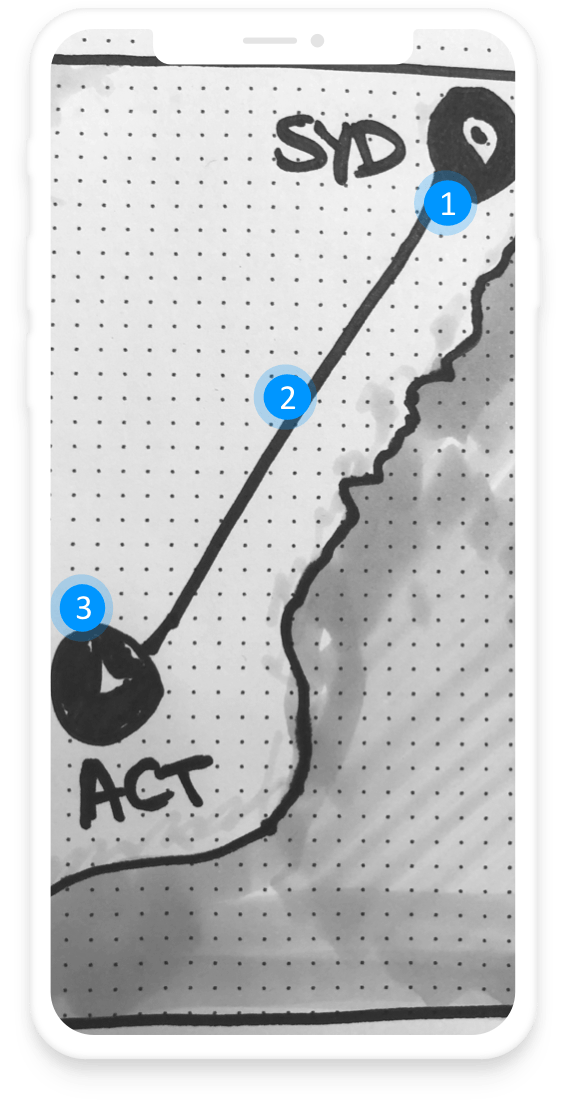
When in the air, I want to see the parcel route so that I can trace its path, speed and distance to establish the time it has taken from A to B. If no reception is available, then it will track a straight line to new locations/transit stops.
What will the video record?
I want to record the “behind the scenes” of the postal system, how long it sits within a warehouse, the duration of different stages of the process i.e handling and the movement of parcels.
Where, when and at what time the parcel will the parcel be handled, placed in transit? How can we optimise these steps to enhance our delivery service?
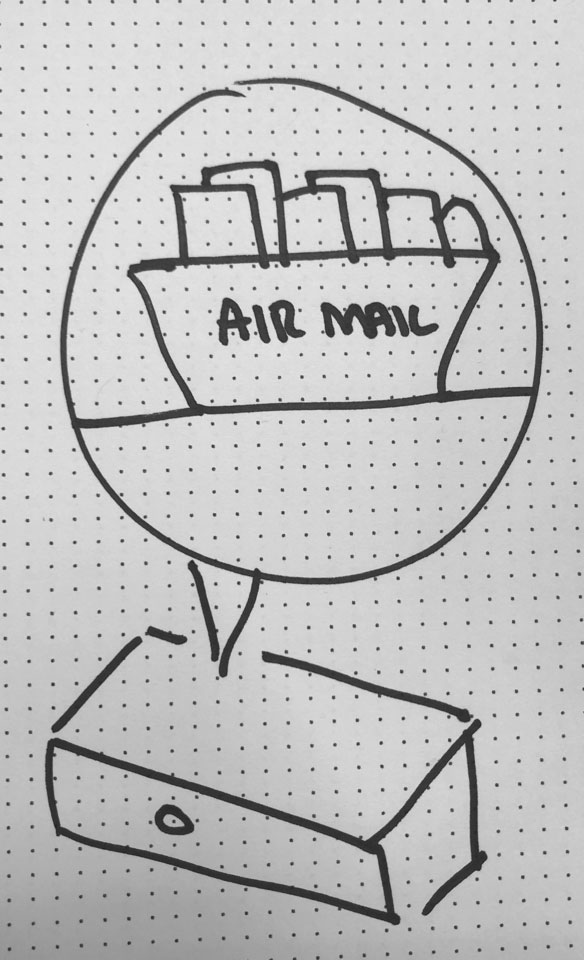
And where possible track ‘air’ location so that we can predict the time taken in this phase with real data on distances, time, speed and air routes.
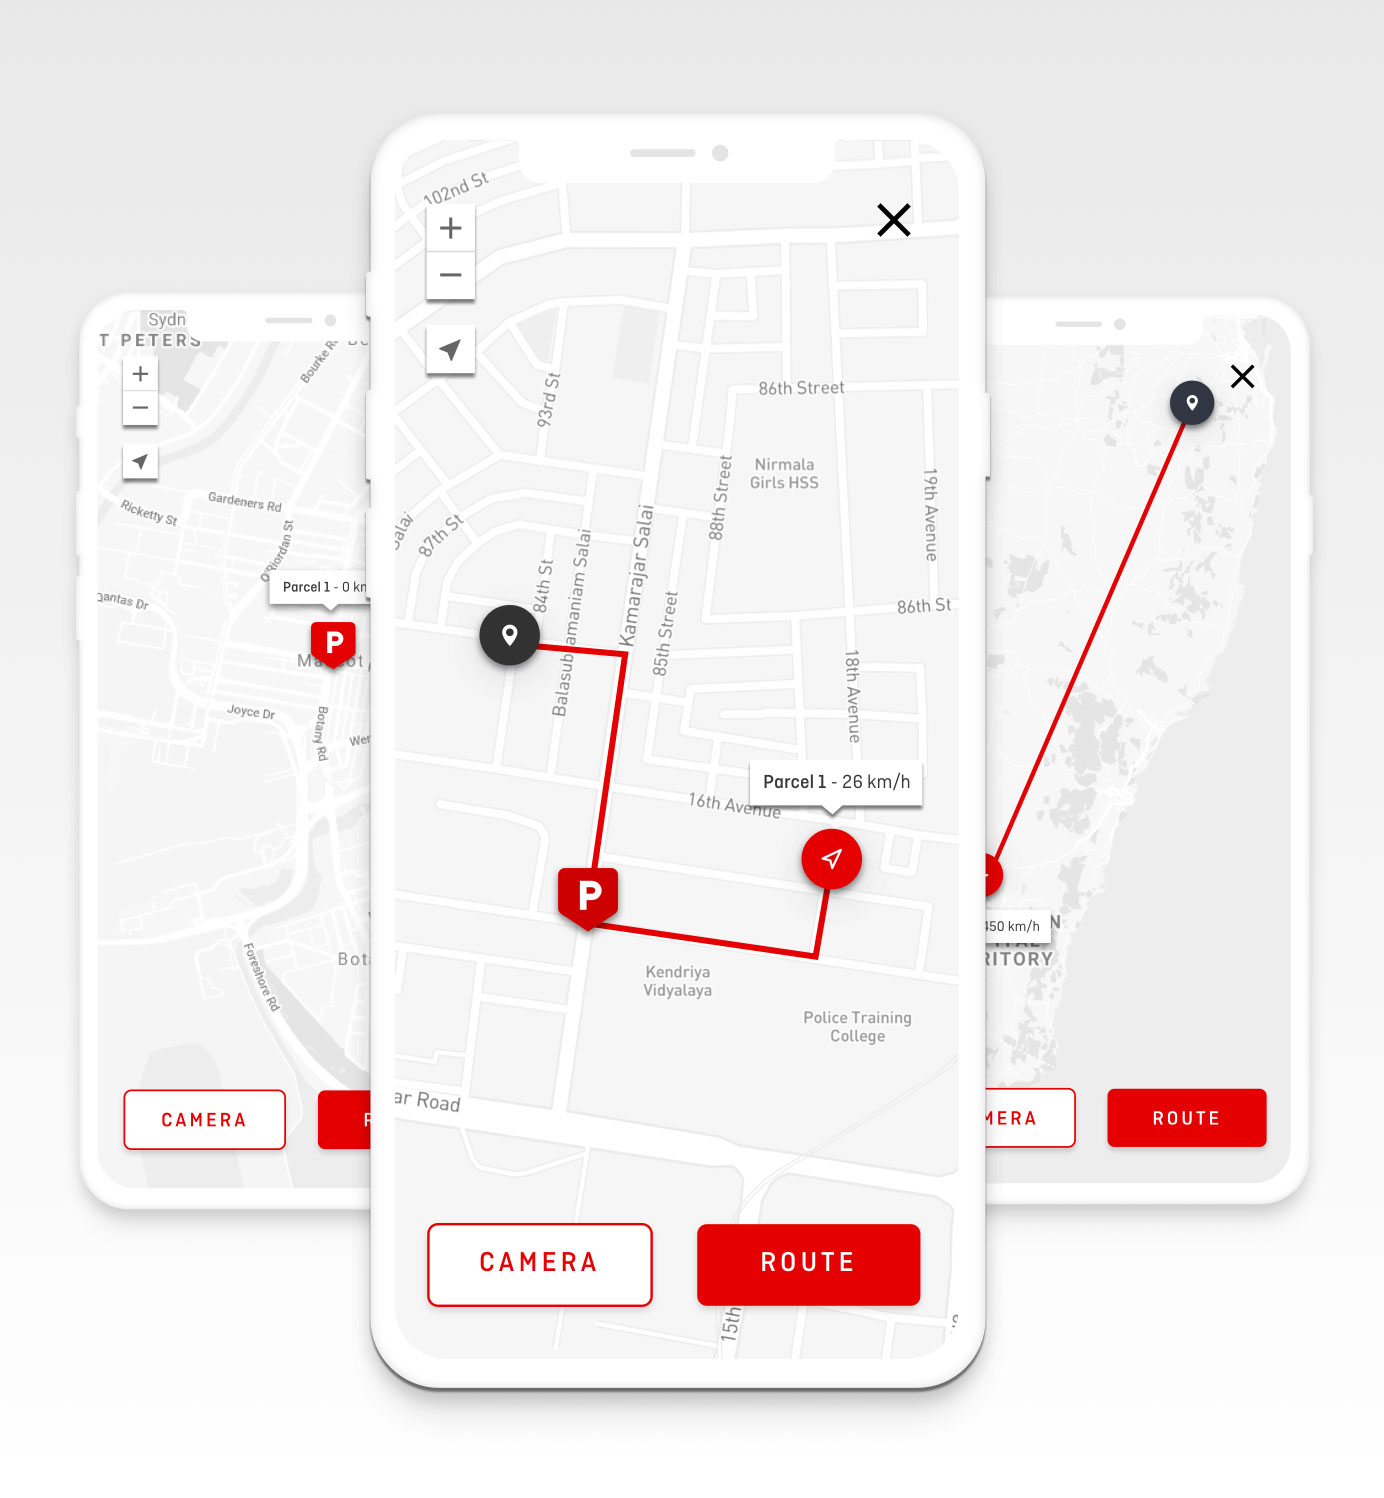
Wireframes
After many rounds of iterations and design reviews, I started to create the wireframes which were based on final feedback from stakeholders, Product Owners and the team.
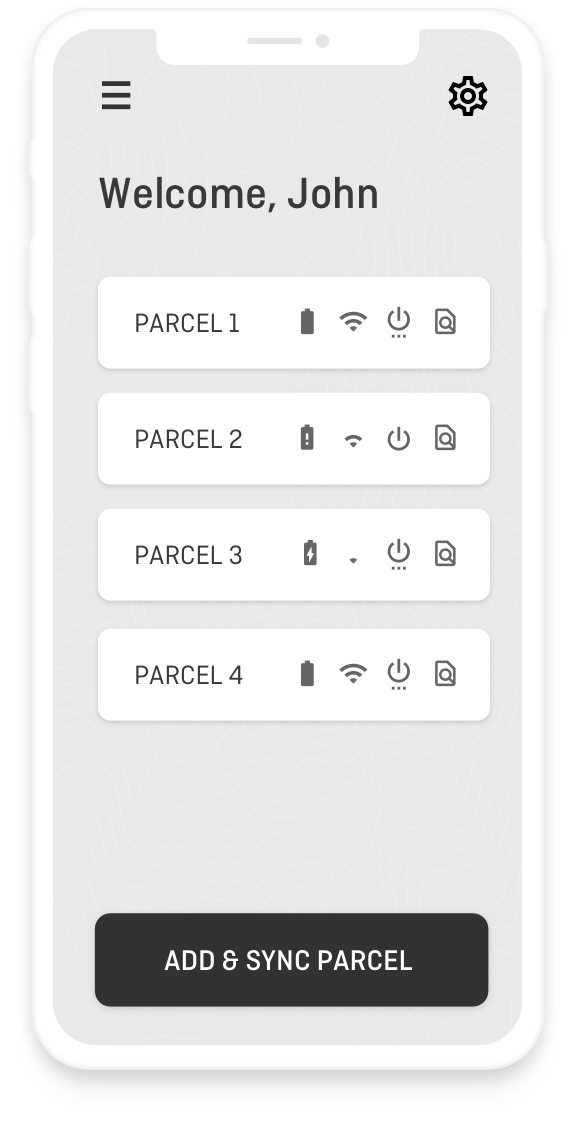
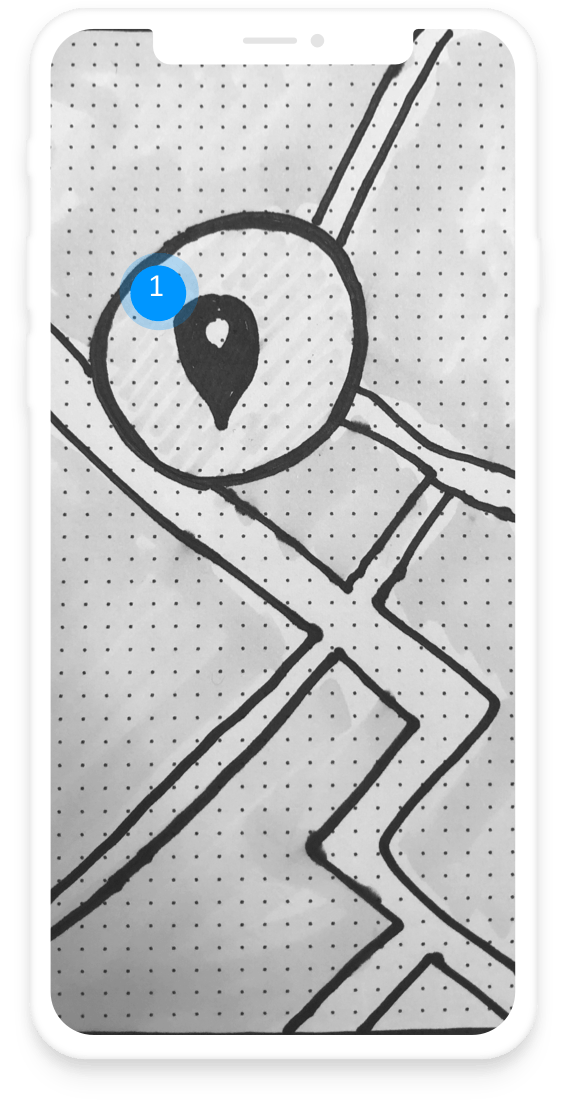
Track all parcels
Each parcel can be managed by clicking on the button. You can also add a new parcel, view battery life, connectivity and more info.
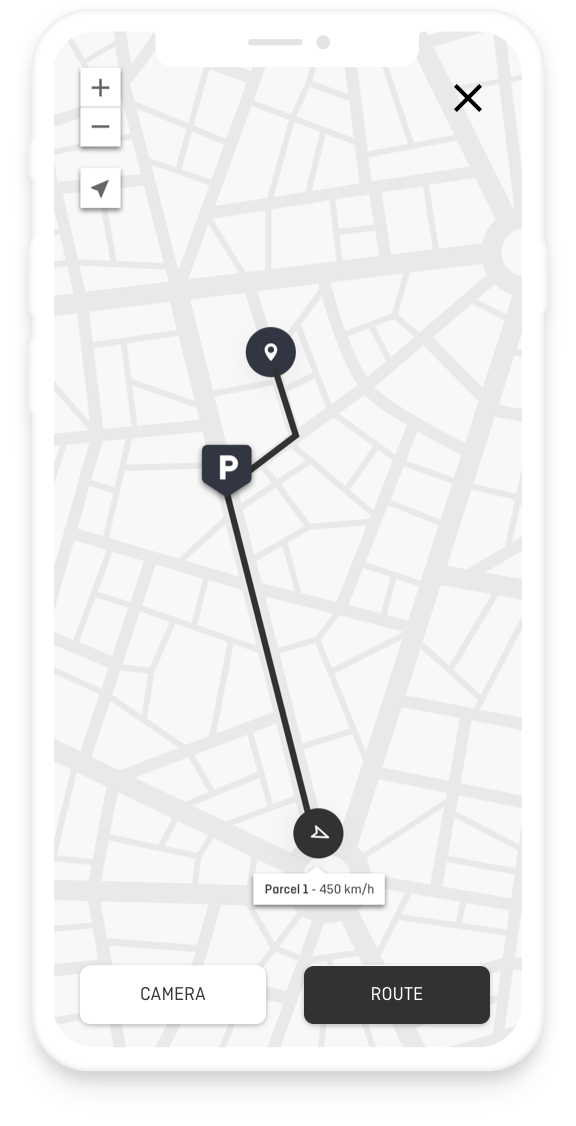
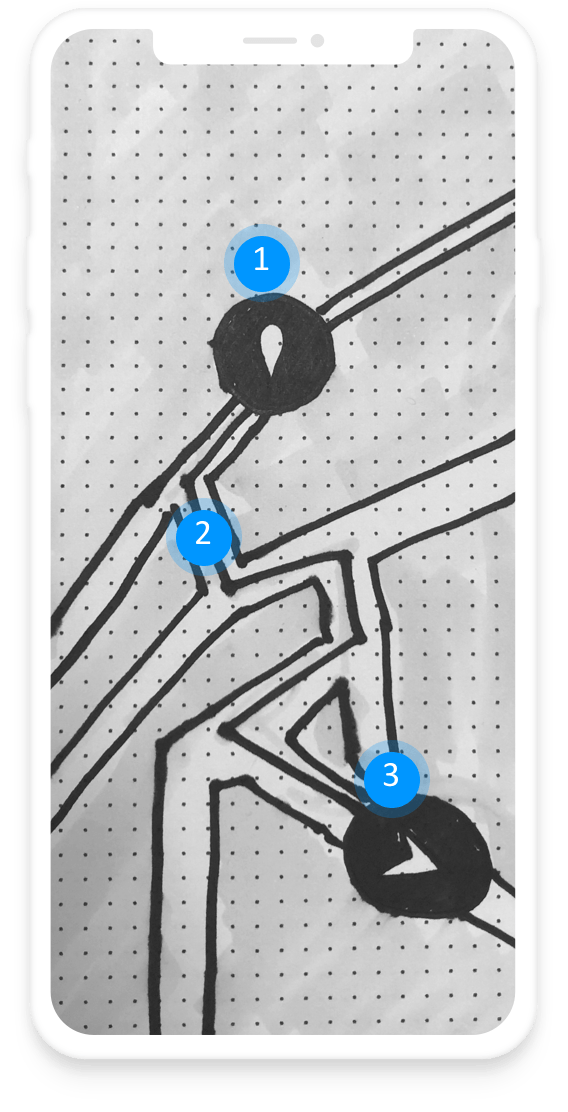
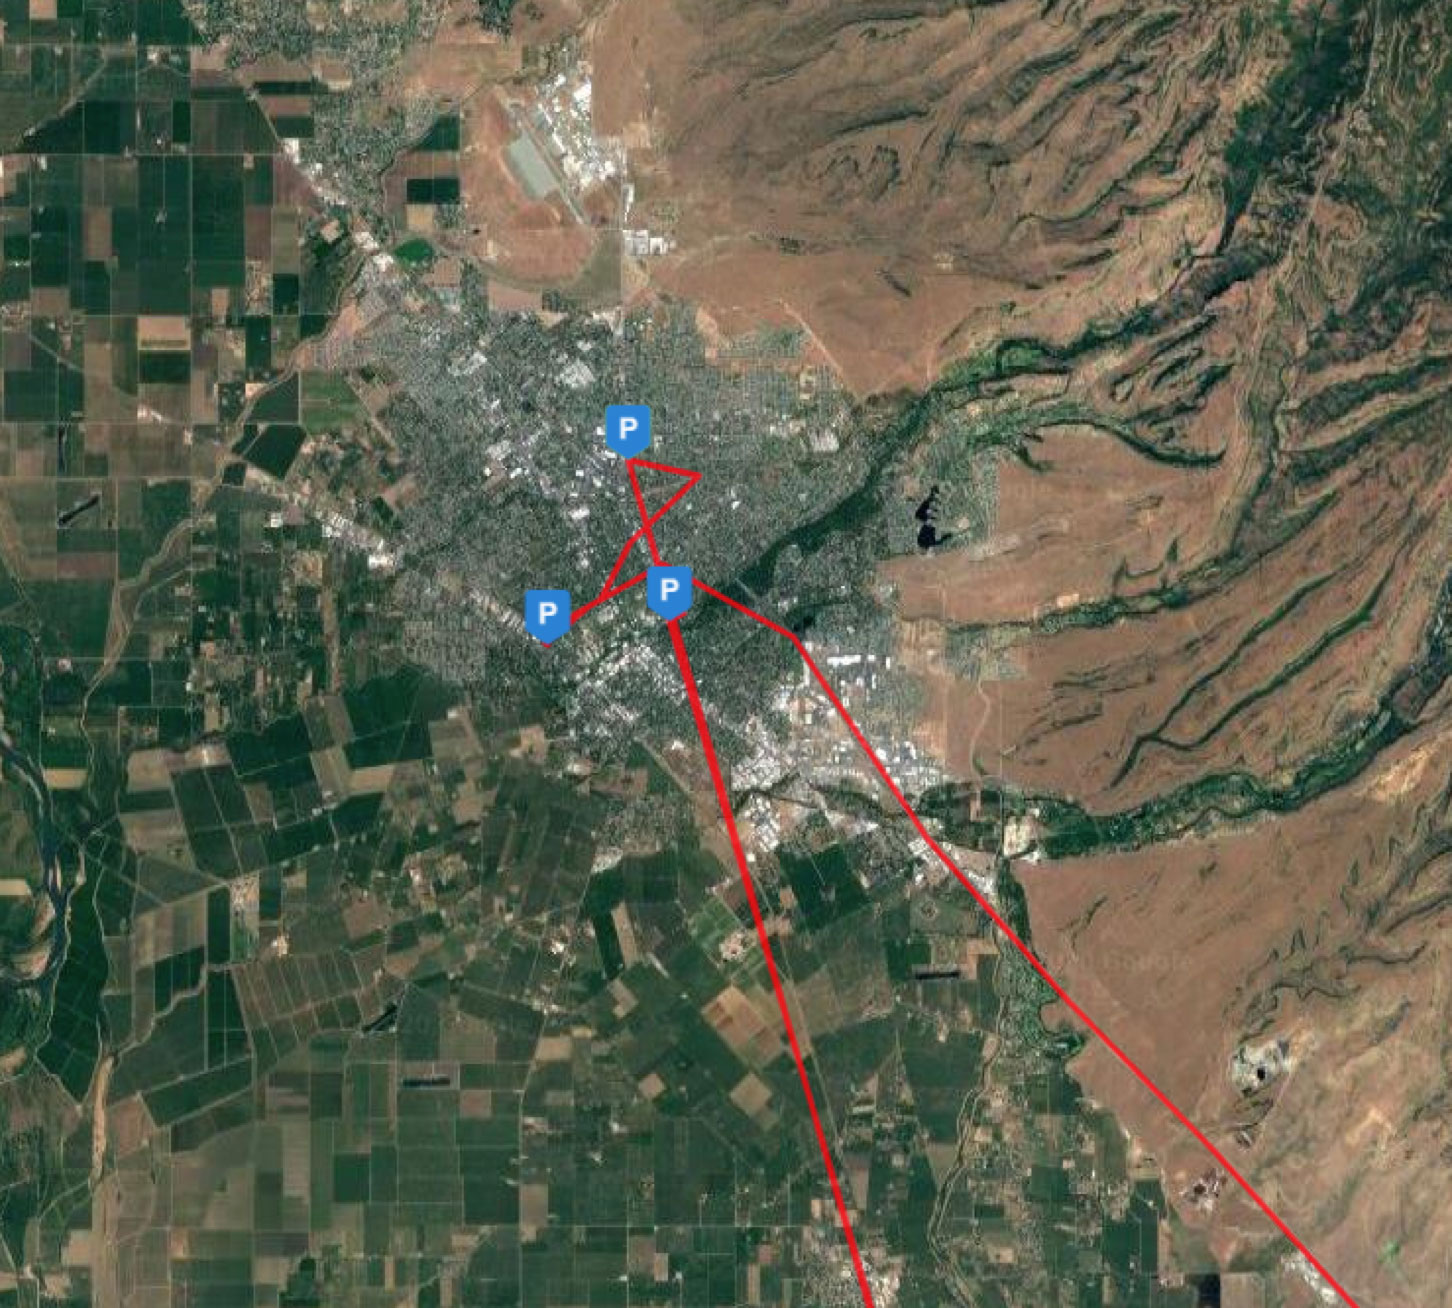
Tracking route
Track routes and stops, distance, speed, height - the camera records the environment.
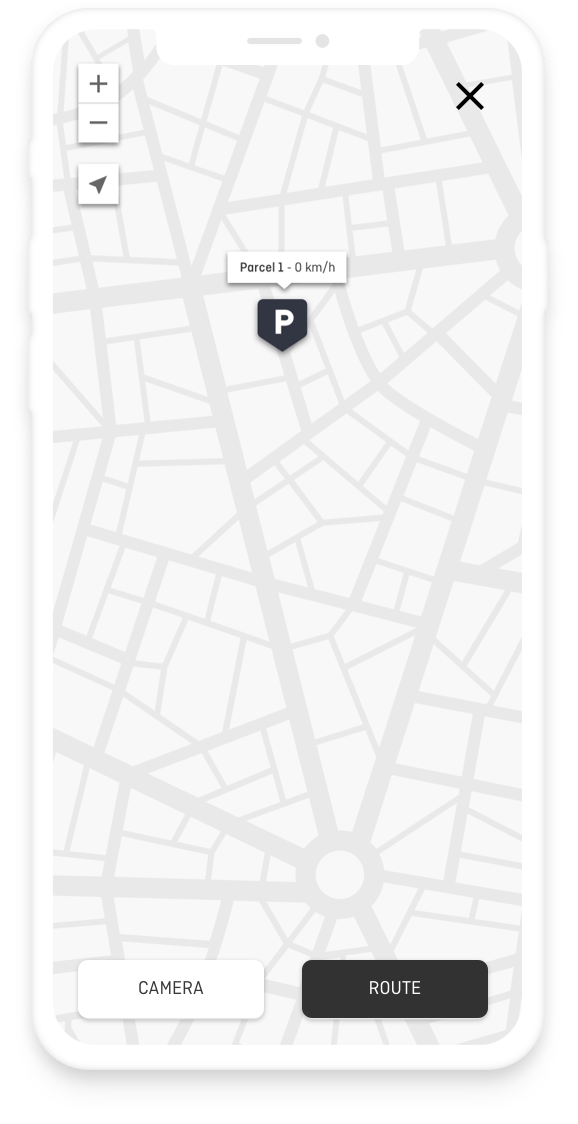
Track stops
Track parcel stopping on the route, icon changes to a parking sign. The camera will record its environment.

Tracking air
If GPS can connect we will record air speed and location. Camera will record environment.
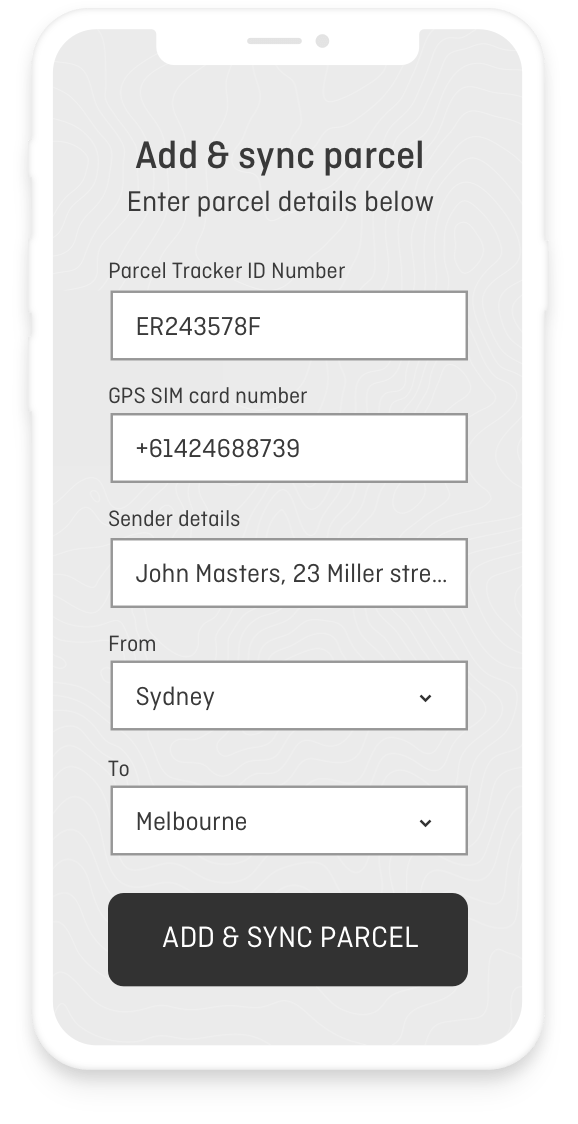
Add and sync parcel
Add new parcels by adding the relevant parcel tracking info, sim card and recipient details.
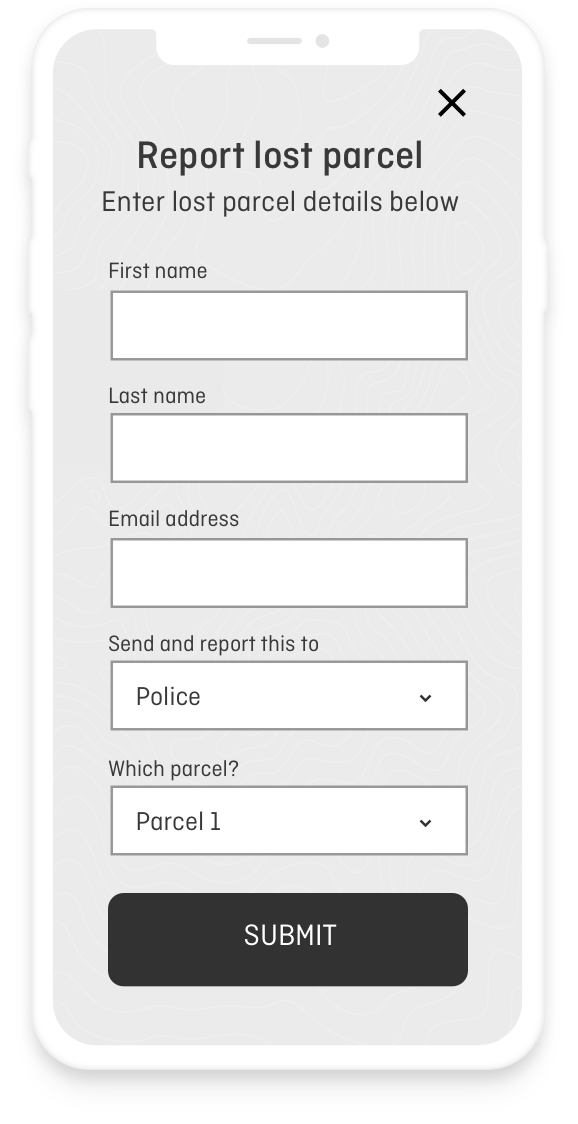
Report lost parcel
Report stolen or lost to police by sending all evidence.
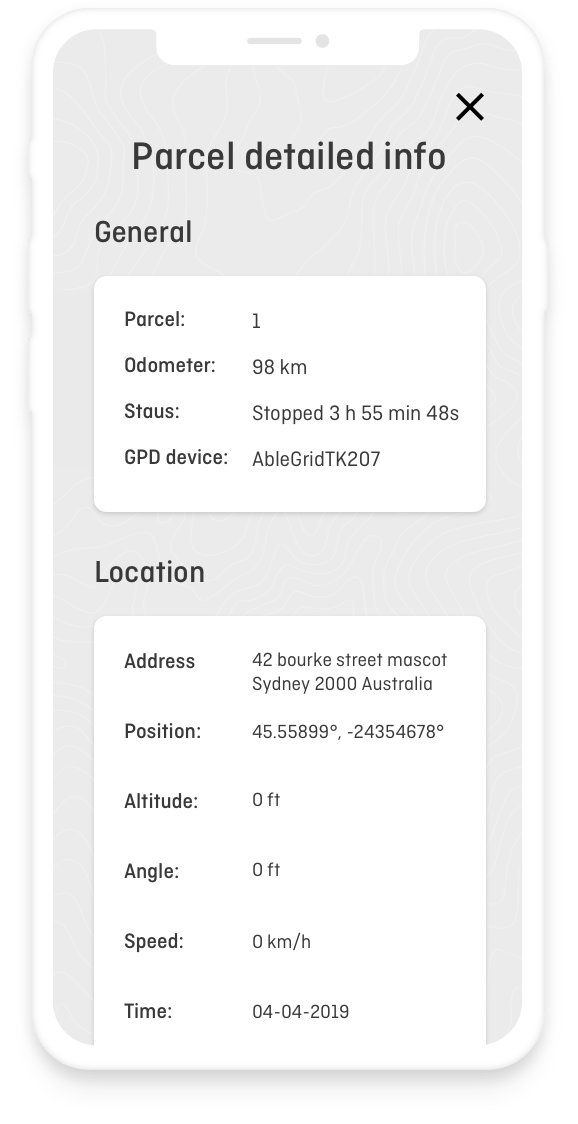
Parcel detailed info
Parcel data recorded is displayed i.e location address, distance, speed, duration.
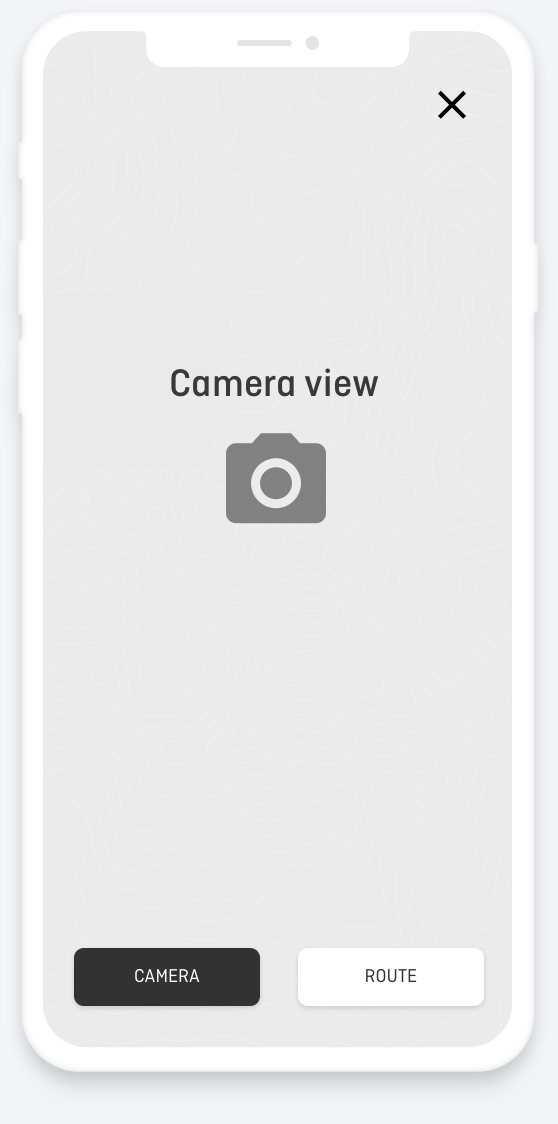
Video Camera
Records 30 sec video snippets recorded througout the journey.
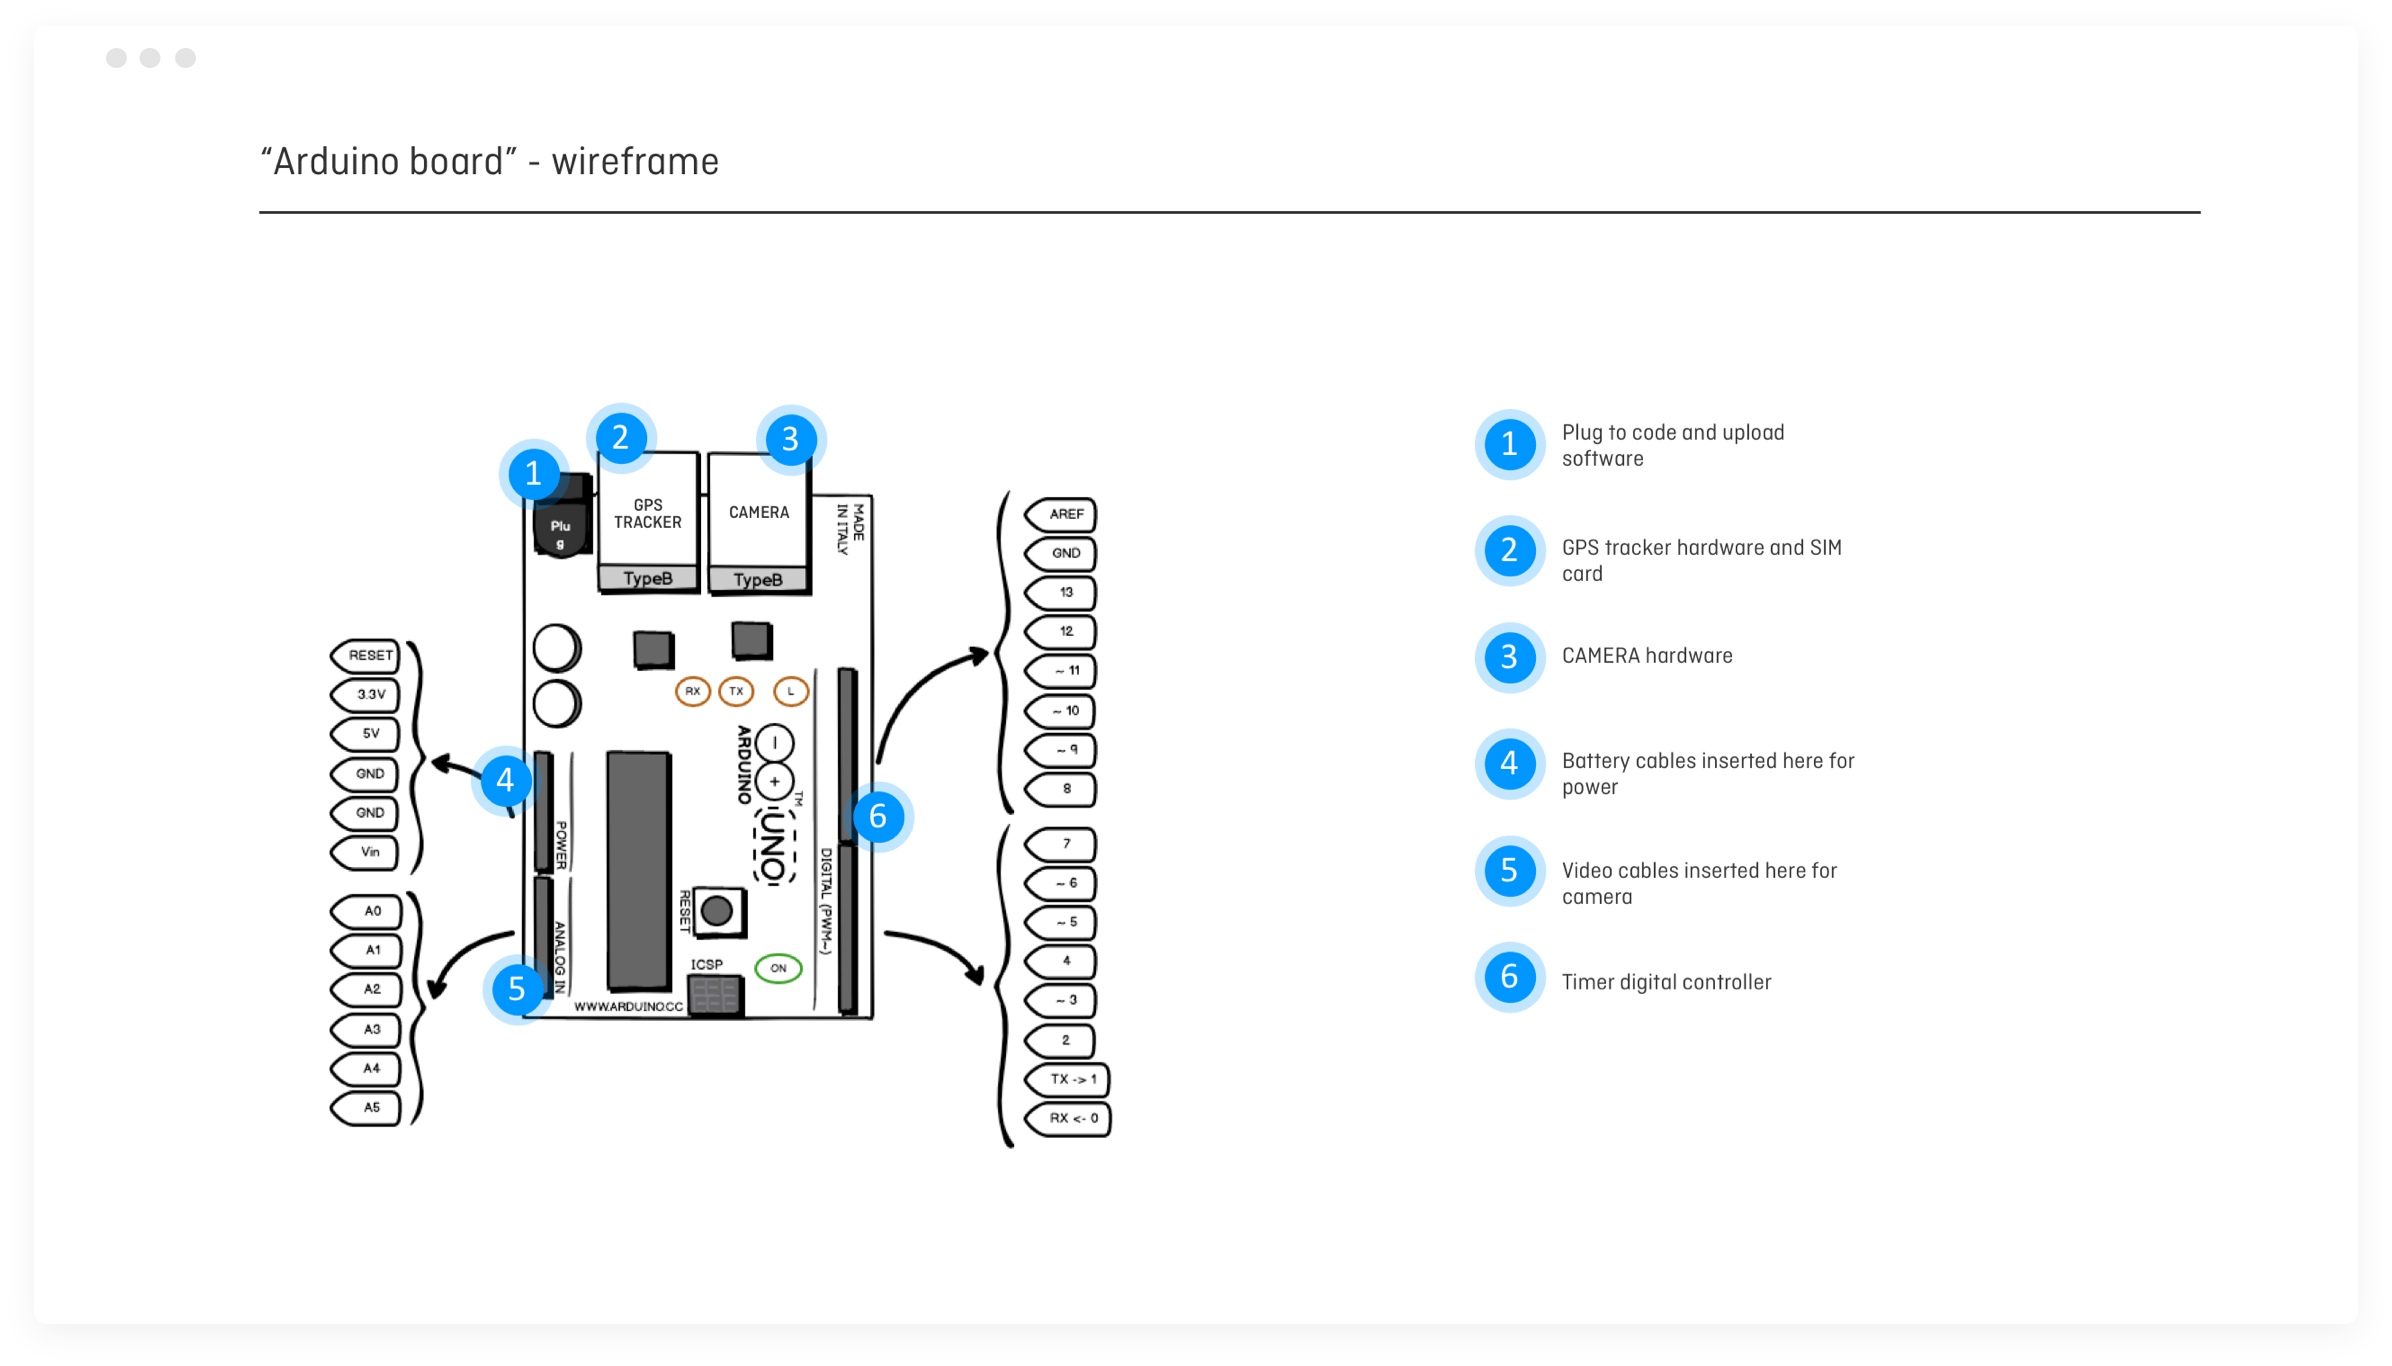
Ardunio board wireframe
Created a wireframe to make sure we had all the correct hardware so that we didn't waste time in trying to figure out what functionality was or wasn't needed when we were building it. I also did this to align and set the expectation with stakeholders and product owners that this was what we were going to record as data.
UI Design methods
-

Interface inventory and User interface design
-

Concept mock up
-

Prototype building and testing
-

UI Trends benchmarking
-

Micro interactions and animation
-

Pattern Library and styleguides
Interface inventory
I created user scenarios that allowed us to view the skeleton structure based on users primary goals.
Using the schemas below I was able to create a general logic of architecture that gave us a whole picture of the process and required screens
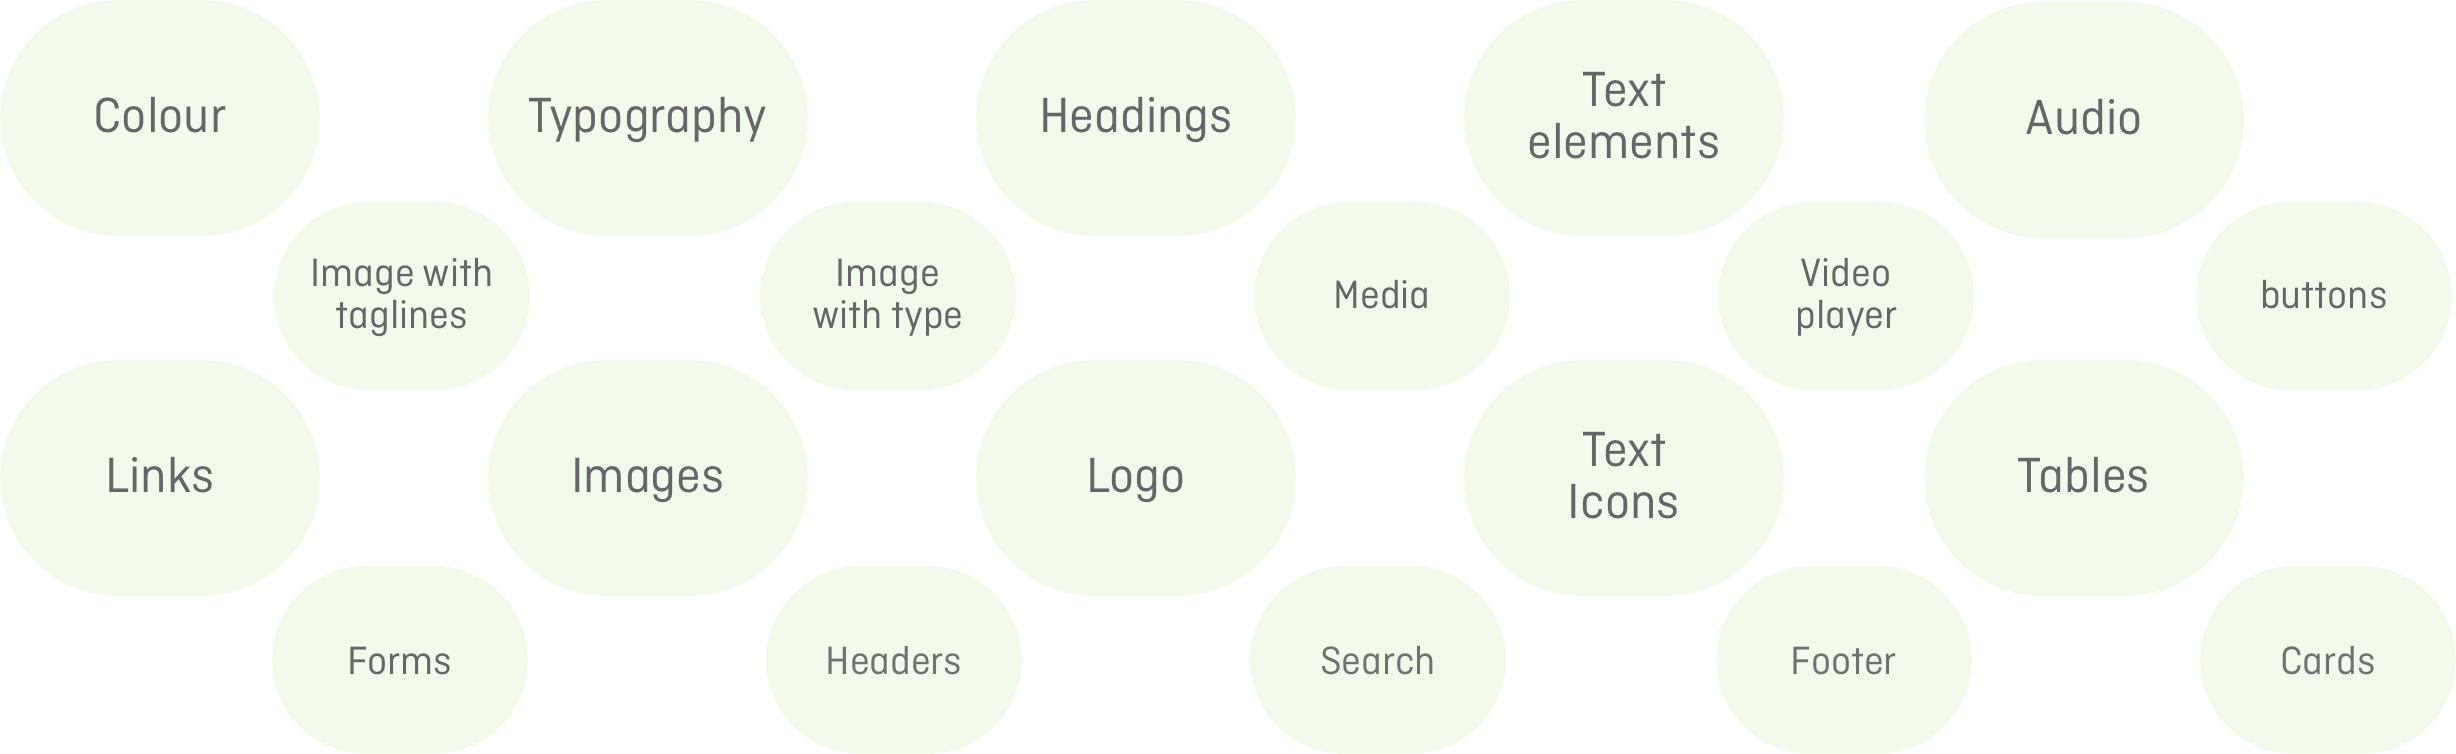
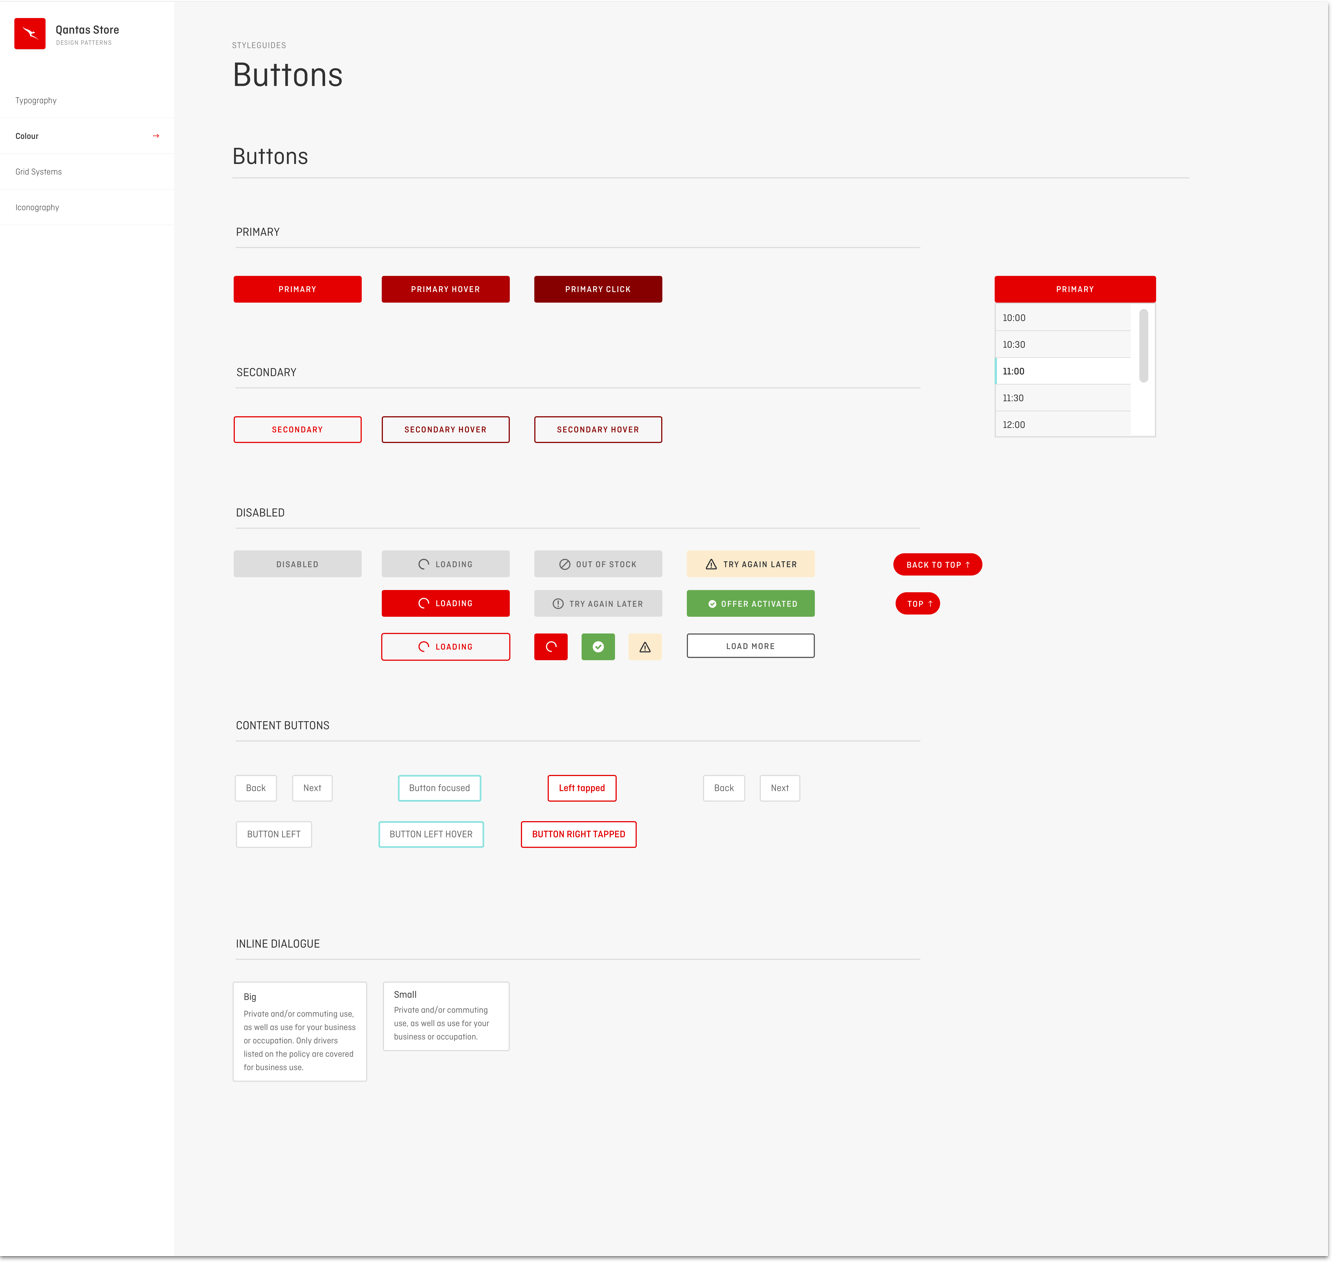
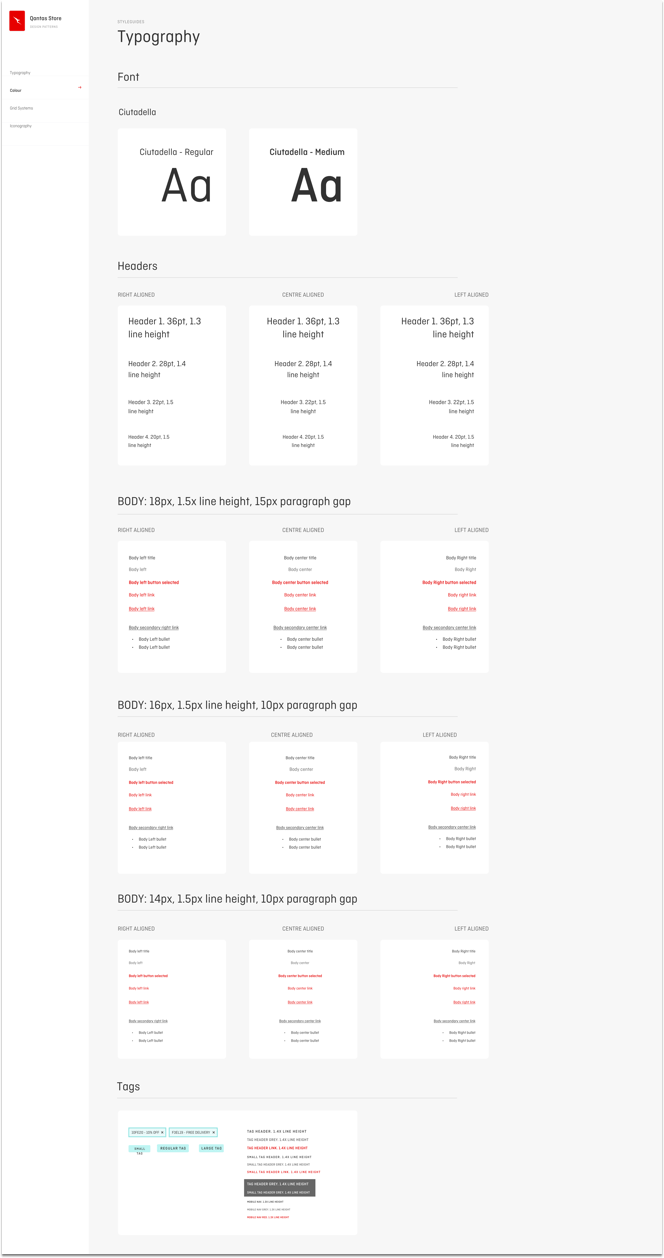
Pattern Library and styleguides
Once the logic process was bedded down I created a Pattern Library and styleguides to ensure consistency across the experience.


User Interface Design
After many rounds of iterations and design reviews, I started to create the wireframes which were based on feedback from stakeholders and the team.
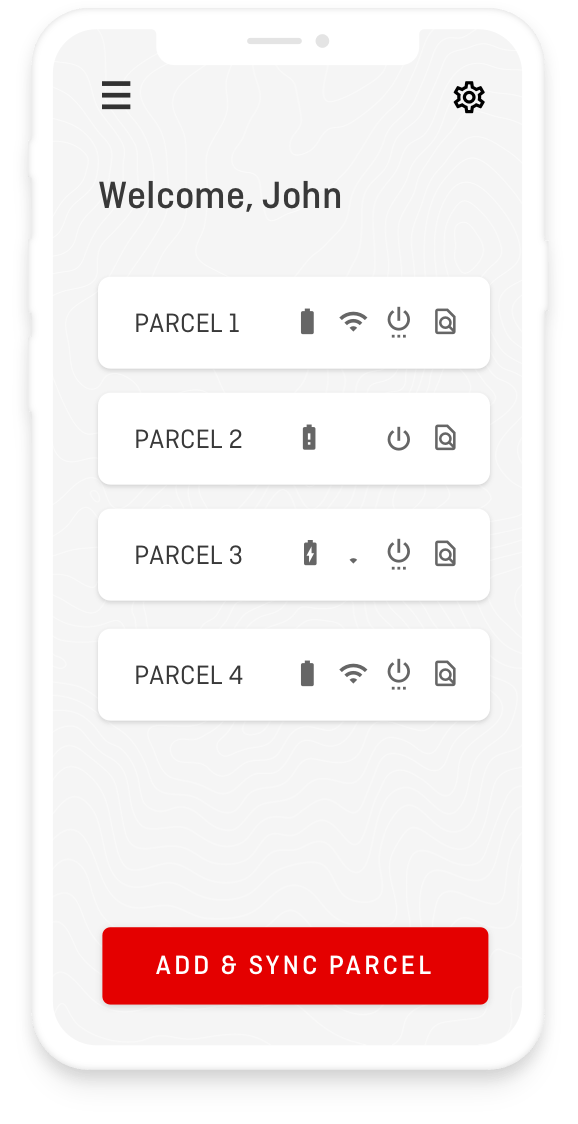
Track all parcels
Each parcel can be managed by clicking on the button. You can also add a new parcel, view battery life, connectivity and more info.
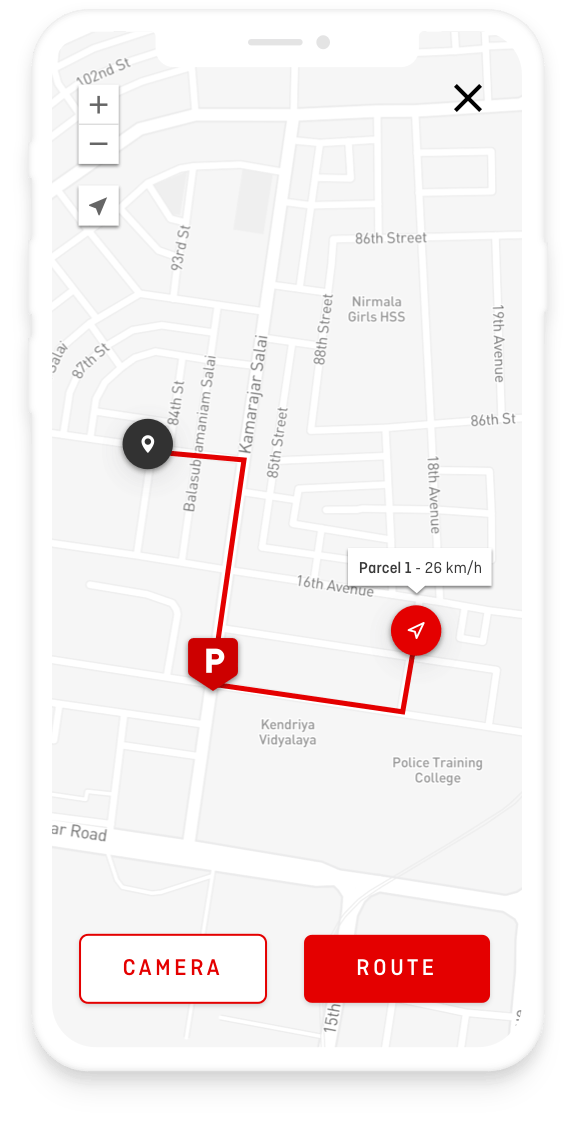
Tracking route
Track routes and stops, distance, speed, height - the camera records the environment.
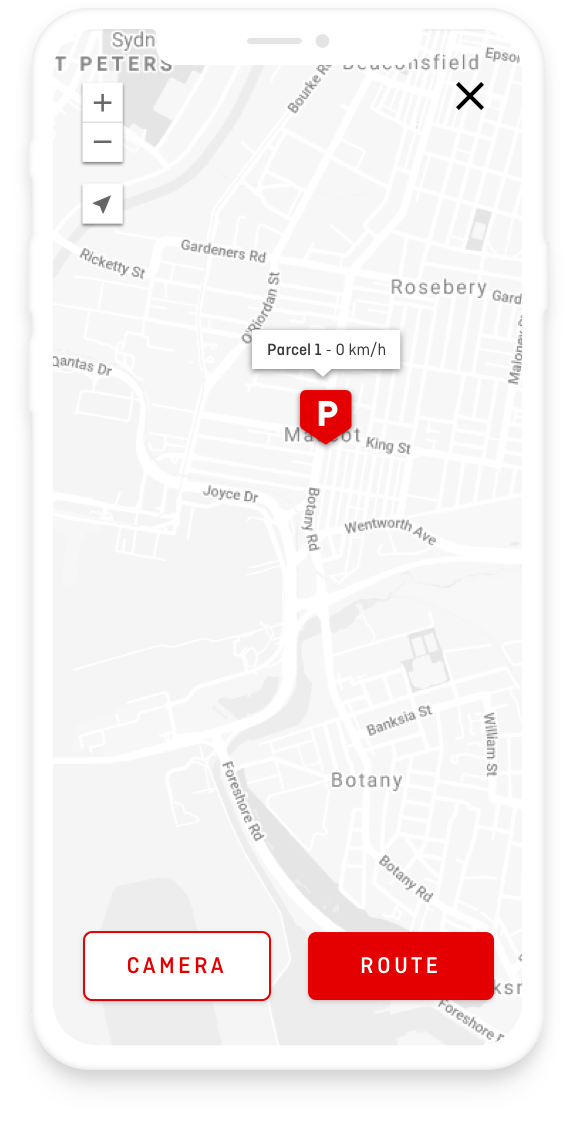
Track stops
Track parcel stopping on the route, icon changes to a parking sign. The camera will record its environment.

Tracking air
If GPS can connect we will record air speed and location. Camera will record environment.
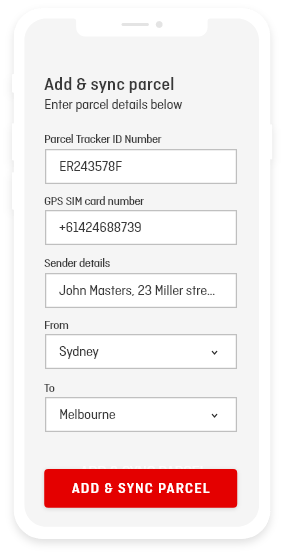
Add and sync parcel
Add new parcels by adding the relevant parcel tracking info, sim card and recipient details.

Report lost parcel
Report stolen or lost to police by sending all evidence.
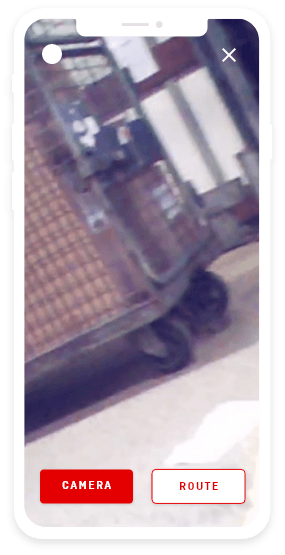
Video Camera
Records 30 sec video snippets recorded througout the journey.
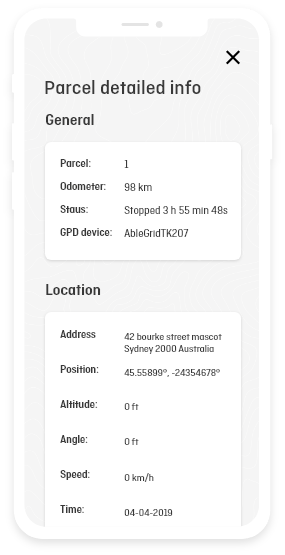
Parcel detailed info
Parcel data recorded is displayed i.e location address, distance, speed, duration.
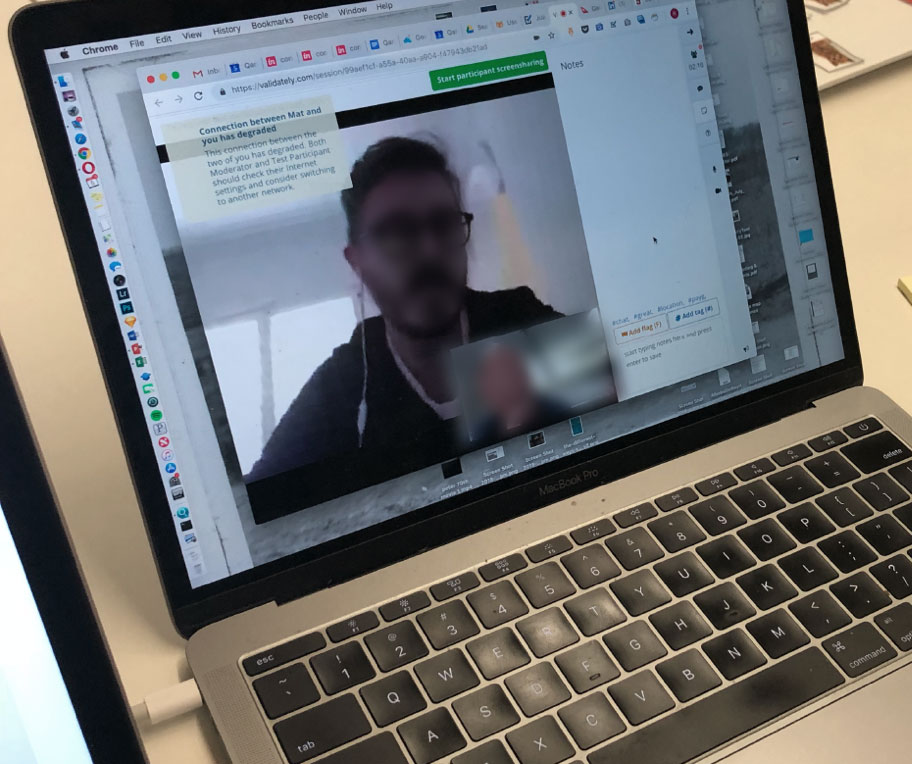
Prototype and test methods
Due to a signed non-disclosure agreement and data protection, I can't show any prototypes or testing examples.
-

Collaborate with external provider on build, UX and UI
-

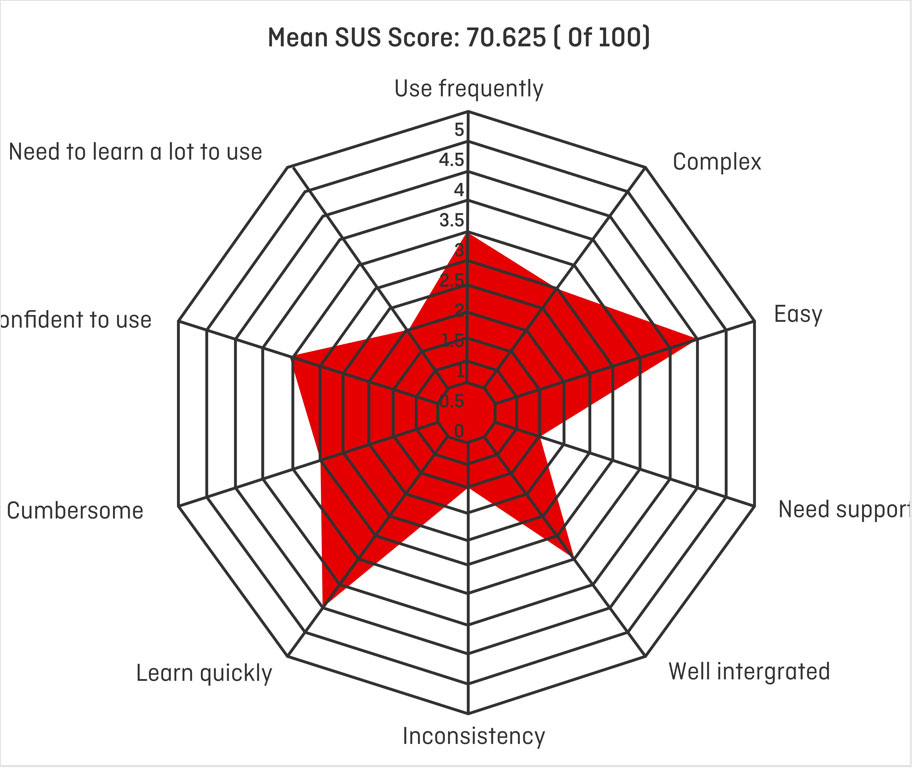
Usability testing
-

Micro interactions and animations
-

Design iteration of UI and UX
-
Built many feature Prototypes
-

Testing and iterated Prototypes
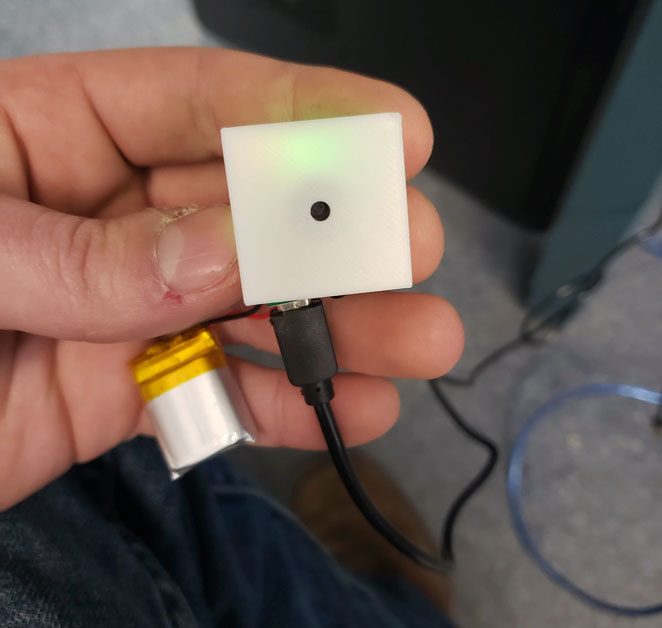
Prototype of parcel
After many rounds of iterations and design reviews, I started to create the physical design.

Spy hole
We found 4mm holes for the camera were best for both the camera lense and recognition.
Type of Camera
We played around with all different types of cameras and hidden material. This was a nightmare as we went through 12 different cameras. Not all camera specs were correct!!!
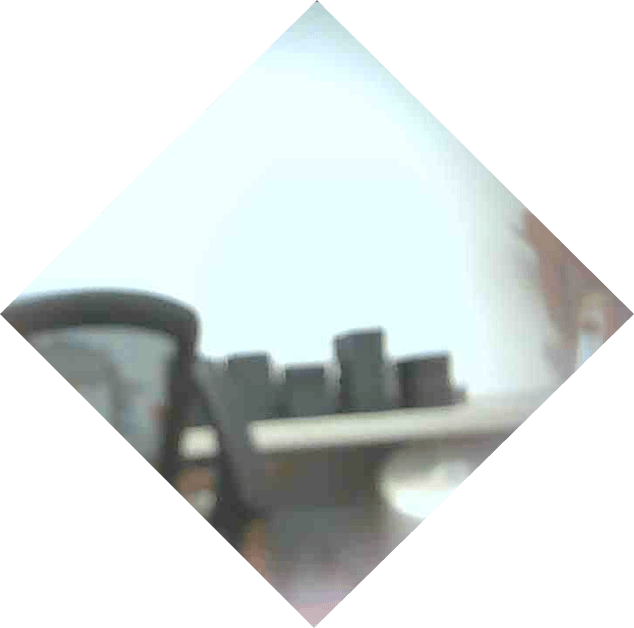
Clarity of Image
Various cameras also gave various qualities of image. We trialled several cameras to source the required clarity.
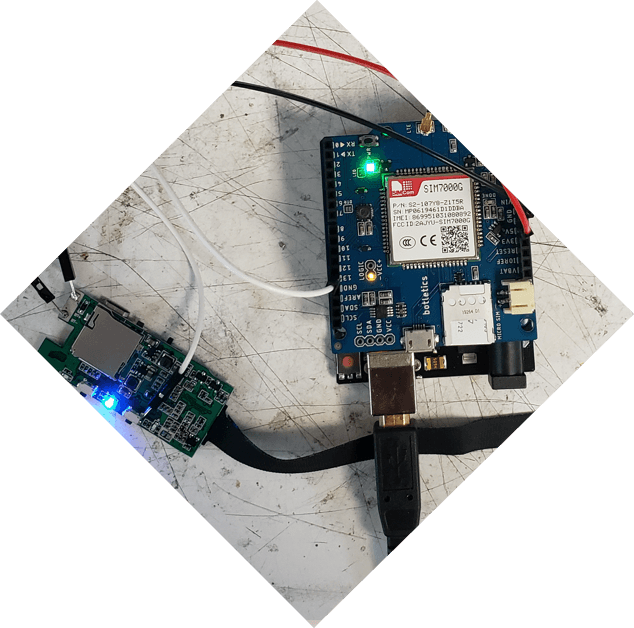
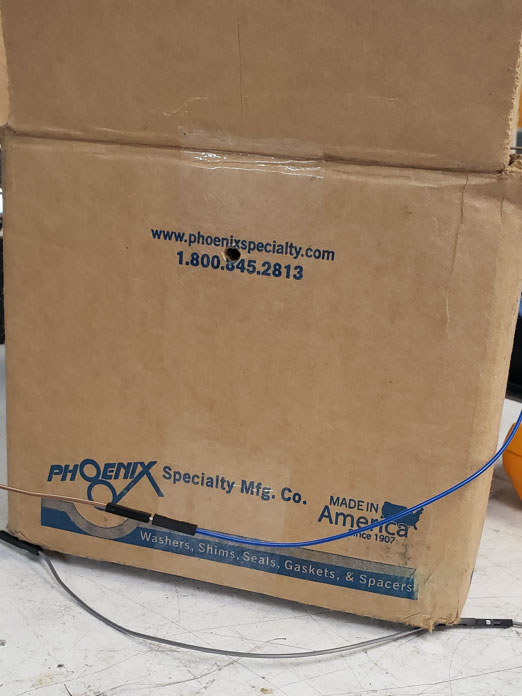
GPS Tracker
We bought some GPS tracker hardware and connnected it.
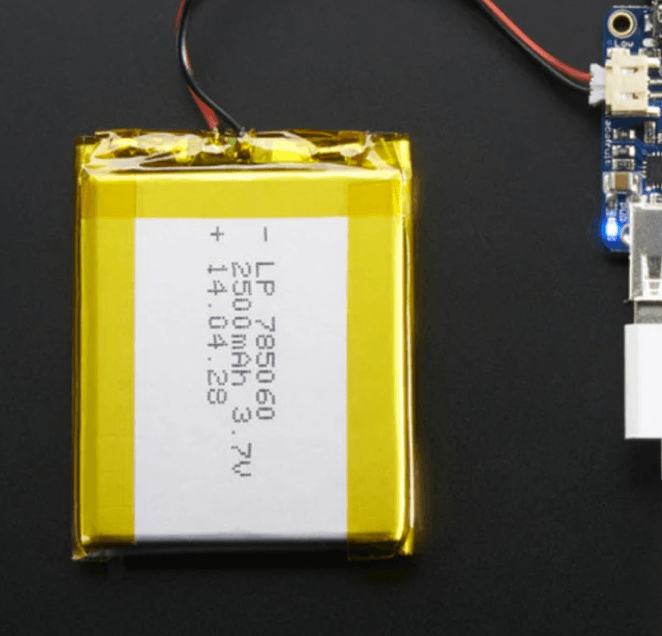
Battery issues
We trialled many different types and strengths of batteries. We discovered that battery life was an issue. We decided on a 12 volt battery
Location traced
Walking across the street with the parcel we managed to get the GPS location working. Battery consumption was still too heavy.
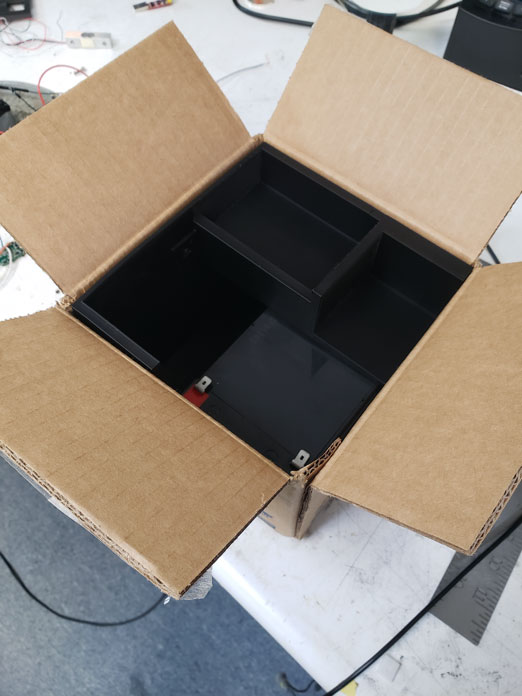
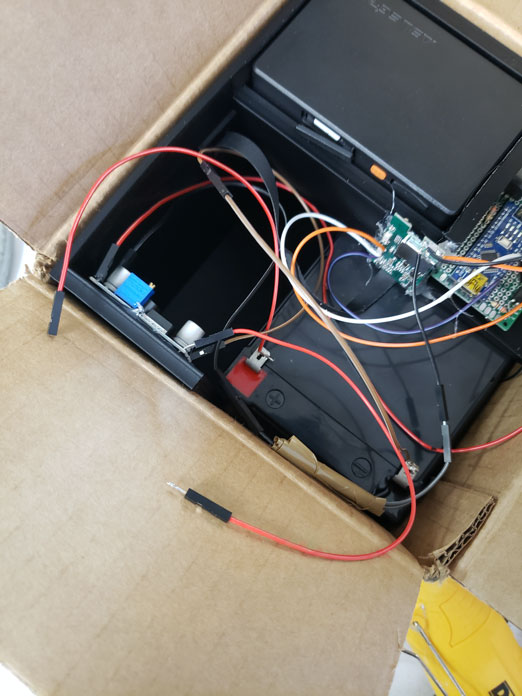
3D Printed holder box
To make sure nothing broke in transit a 3d case was made
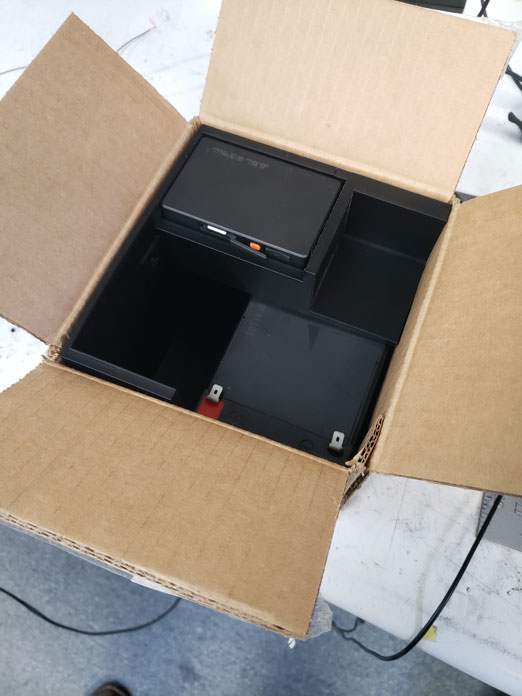
GPS Tracker
The GPS tracker unit was super glued and encased around the hardest part of the case
12v Battery
12 v mini battery was installed into the box. Extra casing was added around the battery to make sure that if it exploded, there would be no fire.
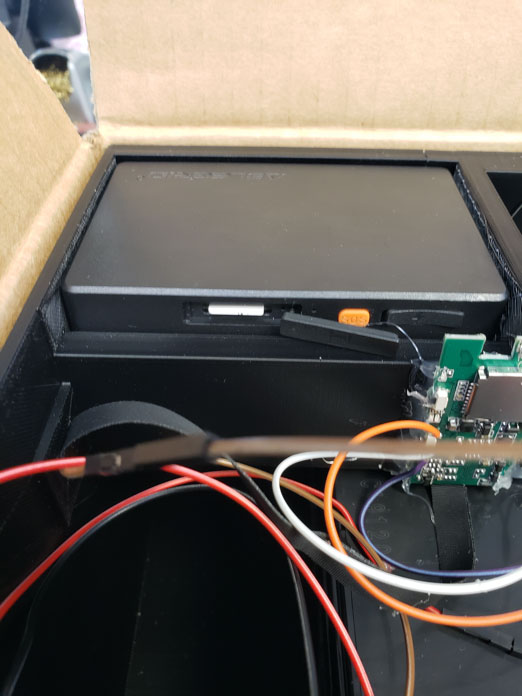
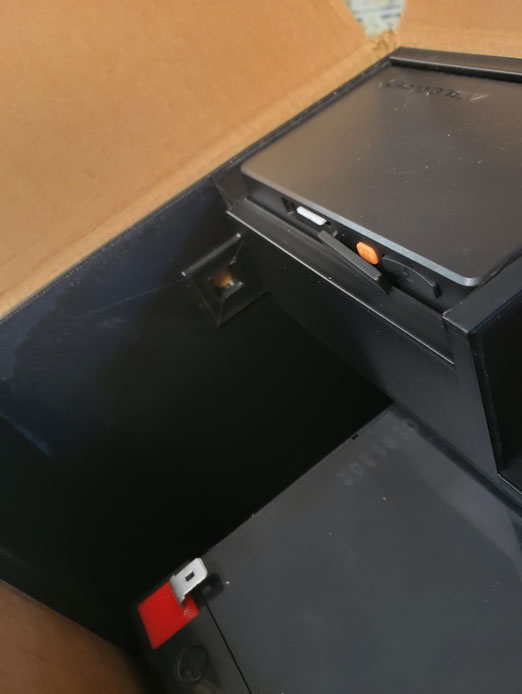
Timer trigger plugged in
To make sure we recorded snippets of video a timer was added
Video camera
The video camera was added to record snippets of video
Camera hole
I drilled a hole to allow the camera to view its surounds. I also sribbled across the box with a black pen
TESTIMONIALS
“ Fred has provided a consistently high level of ux/ui service to Qantas Wine over a sustained period of time including implementation of one click purchase, Mini cart express, managing ux issues and delivering month-on end results within challenging timeframes. Without his on-going support, we would not be able to complete our own deliverables. Thank you Fred! “Lisa Hudson Head of Qantas Wine
Qantas Shopping
“ Thank you Fred for your hard work, persistence and dedication to collaborative delivery on an innovative solution for tracking of parcels. I appreciate the effort that you made to work together and go above and beyond to meet a tight timeline. This complicated and fundamental change to our customer journey, using new tech, was deployed without any problems and is already showing positive results. “Mathew Hollingsworth Digital Product Manager
Qantas Shopping
“I would like to thank Fred for his continued support and being always willing to help the team to get the job done – no matter what the task. Fred adds value through his innovative ideas that assists the team in delivering solutions and continuously improving product performance. Fred has a unique ability to further enhance designs and concepts and take them to a higher level of refinement that makes them something special”Olivia Jones Digital Merchandising Manager
Qantas Shopping